Fluffy Crochet/Amigurumi Supplies and Pattern
PeppermintParchment
Before we begin, let’s make sure you have your supplies!
What you will need:
-Crochet hook. I used a 4.5 mm hook, but anything as low as a 4.0 or as high as a 5.0 should be suitable. If you want to make a gigantic fluffy, feel free to go higher on your hook size, but be aware you will use more yarn and stuffing, and you will have to make your stitches tighter. If you wanted to make some foals, follow this pattern with a smaller hook, such as 3.75-3.1.
-Two skeins of size 4 medium weight yarn (at least). This is what will determine the body and mane/tail colors of your fluffy. You need at least two colors, unless you want to make a monochrome fluffy. If you want to add colorful hooves or a pink snout, a multi-colored mane and tail, or perhaps even spots, be sure to grab more colors! If you want a bigger fluffy, feel free to go up to a size 6, or for a smaller fluffy, down to a 3.
-To make a fluffy this size, I got two skeins of 186 yards of yarn. You will not use this all unless you’re making a gigantic fluffy. However, I recommend this size in case you make errors and need to remake the hooves, legs, or snout.
-Your yarn is THE most important part of the project. Make sure it is a yarn that you are comfortable with running through your fingers repeatedly. I recommend Low-Pill Fiber or other types of yarn marketed towards creating baby clothes. Wool and cotton are nice, as well. It is completely possible to do this project with acrylic yarn, but your fingers may be sore by the end, and your fluffy will not be as huggable. However, if you’re a beginner, acrylic yarn is very easy to work with, and cheap, as well. It’s very useful for your first few projects.
-For this fluffy I used Yarn Bee Soft & Sleek Low Pill Fiber yarn. I highly recommend this brand. Other good brands include Baby Bee and Lion Brand. If you want something cheaper but adequate for learning, try out Red Heart or DIY Yarn.
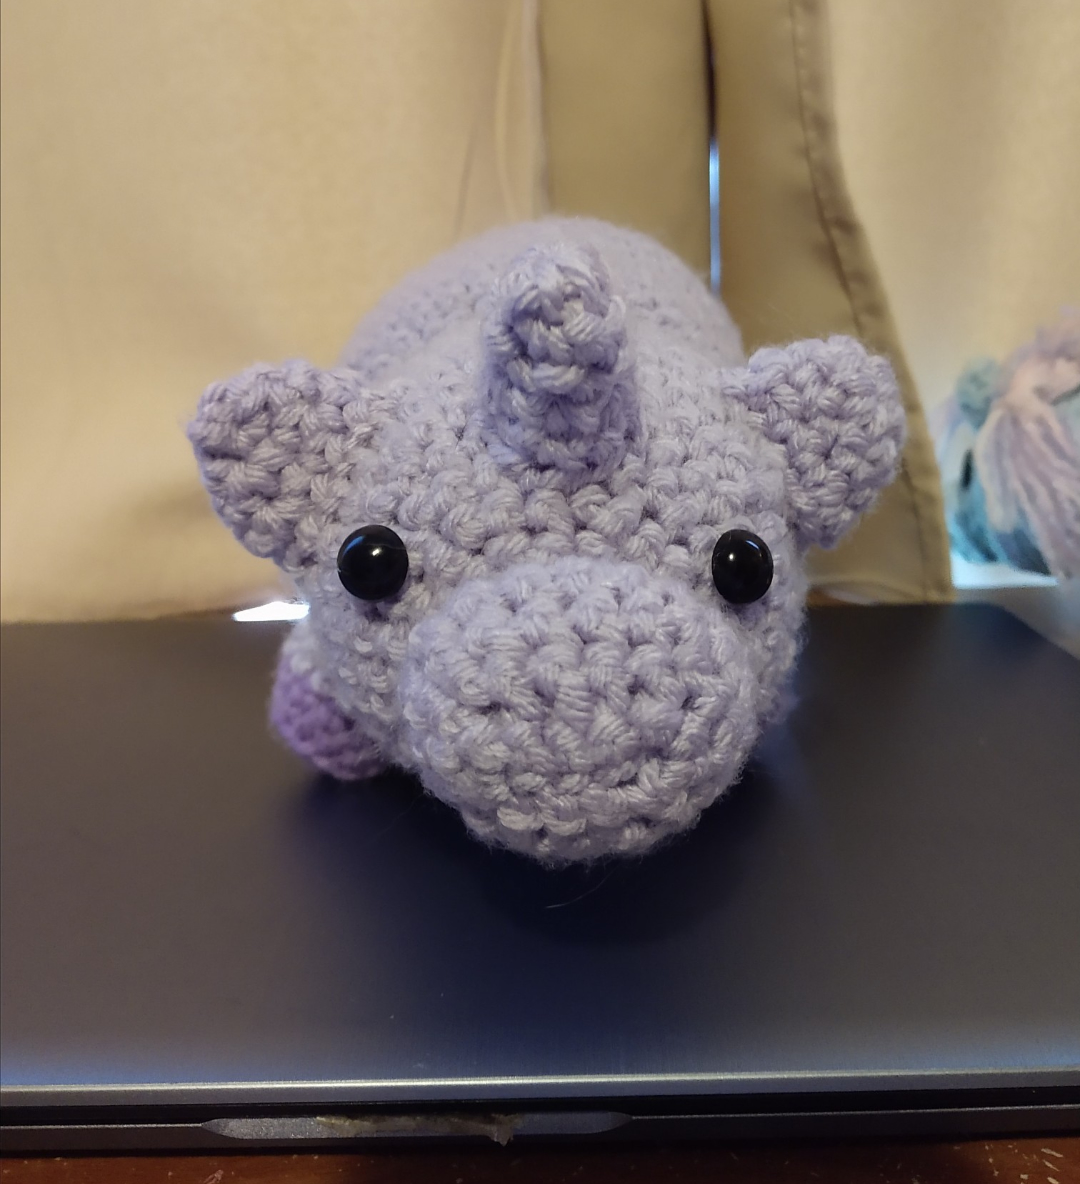
-Safety Eyes or buttons. How big or small you want your fluffy’s eyes depends entirely on you!
-One tapestry needle. Also very important, you cannot put your project together without a tapestry needle. Before beginning, make sure your yarn can fit through the eye of your tapestry needle.
-Scissors. Make sure they’re sharp, dull scissors can cause your yarn to fray or unwind! Children’s safety scissors, hair trimming scissors, or eyebrow scissors work fine.
-Stuffing. Get a decent sized bag, I can guarantee you’ll need more than you think you will! I use Poly-Fil Polyester Fiber Fill in the 16oz bag. This should be plenty for this project.
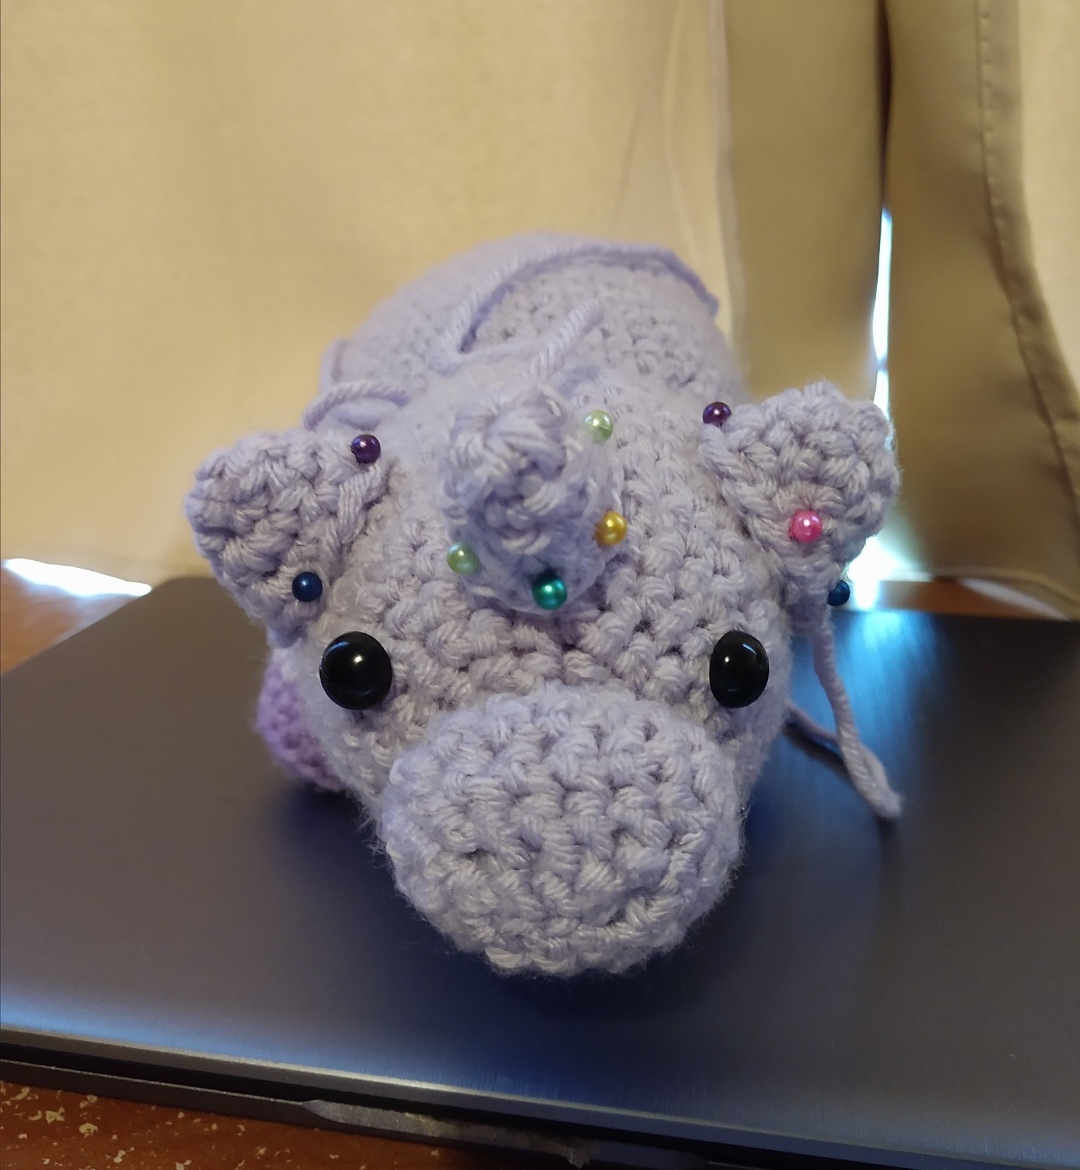
-Straight pins. You’ll need about a dozen to hold the fluffy’s legs and snout in place as you sew it together.
-A stitch counter. This can be something as simple as a safety pin, a bread tie, a pipe cleaner, or another piece of yarn of a different color. It just has to be able to make a loop and stay closed.
This is a very beginner friendly pattern!
We will work the head and body as one piece, the pattern begins with the head. After this we will make the snout, the ears, and then the limbs. I will also include instructions on how to make unicorn horns. We will sew it all together and then add the mane and tail at the end.
Work in the round.
Stitches Used
Magic Circle: AKA Magic Ring
Ch: Chain
Sc: Single Crochet
Inc: Increase
Dec: Decrease
BLO: Back Loop Only
If a line says “all around”, repeat the pattern of the stitches in that line.
( ) with a number indicates how many stitches should be at the end of your row. So (6) means you should have six total stitches when you reach the end of your row and/or your stitch marker.
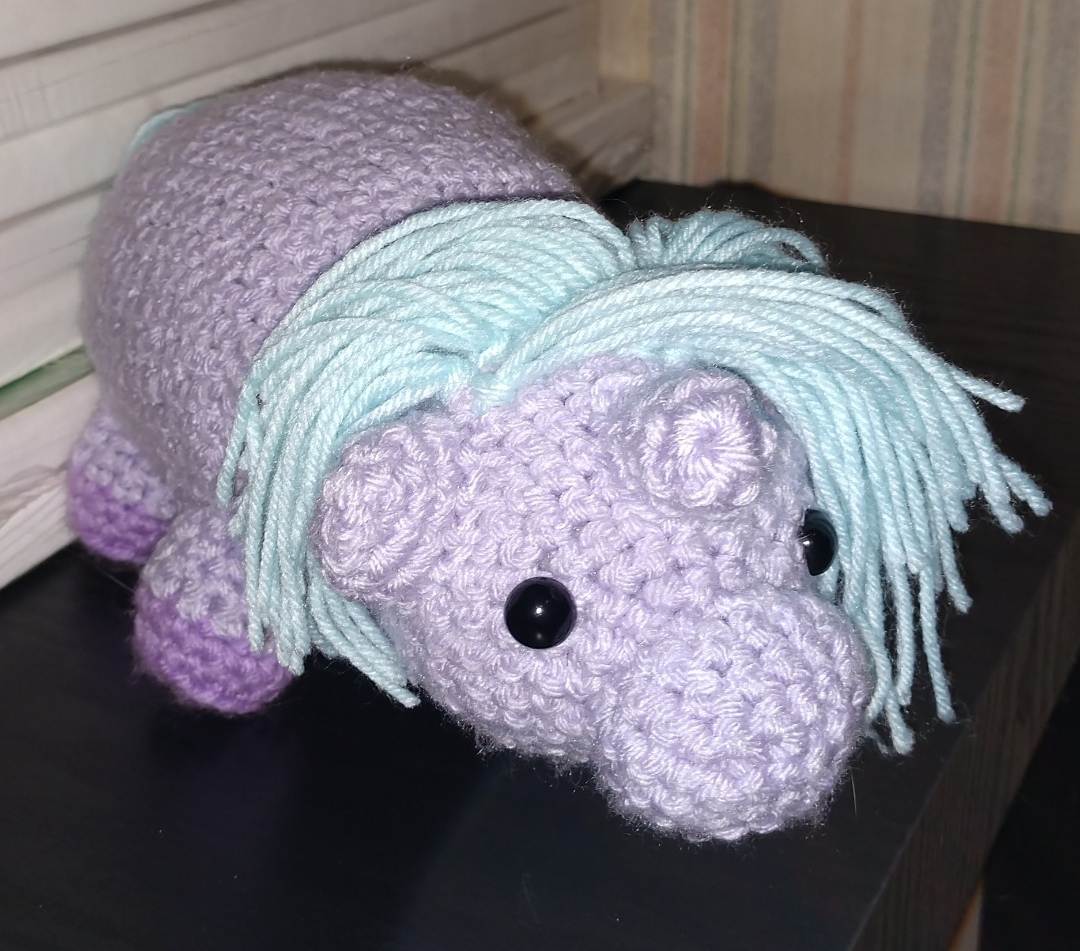
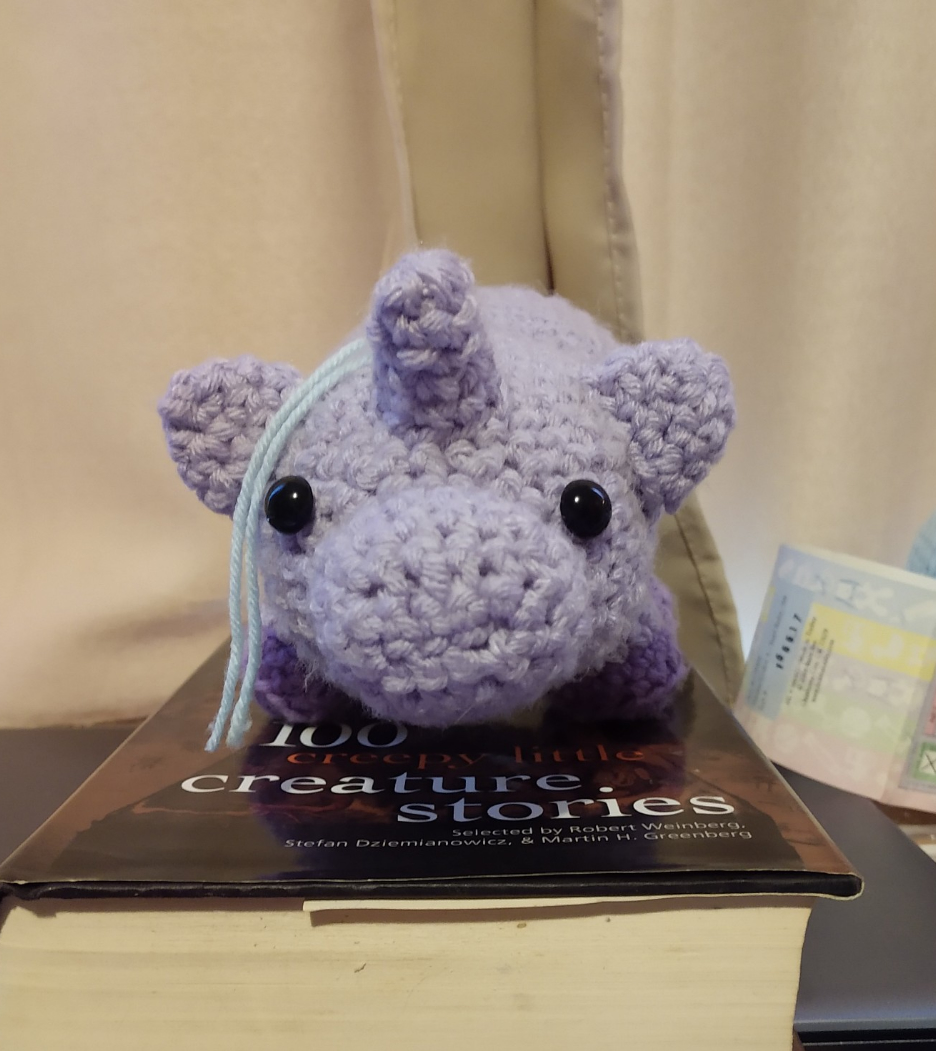
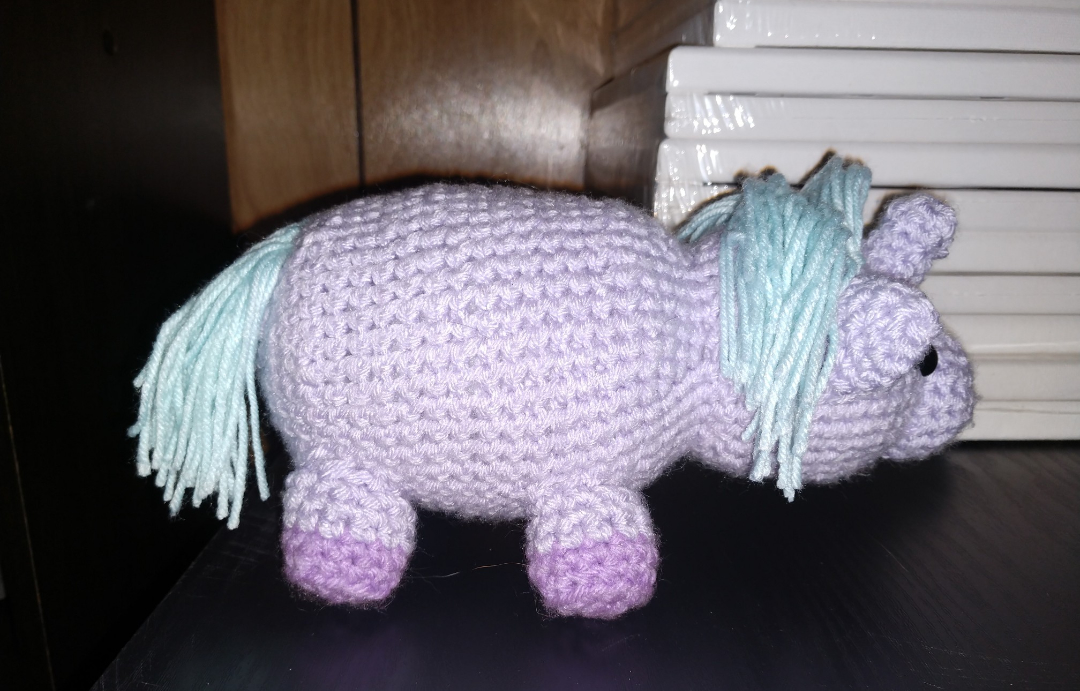
Stats (for example fluffy)
Hook size used: 4.5mm (US)
Yarn weight used: Medium (4)
Total Project time: 3-5 hours.
Total Fluffy Size: 8 inches long, 3.5 inches wide, 4.5 inches tall.
                                   The Pattern

                                Work in the round.
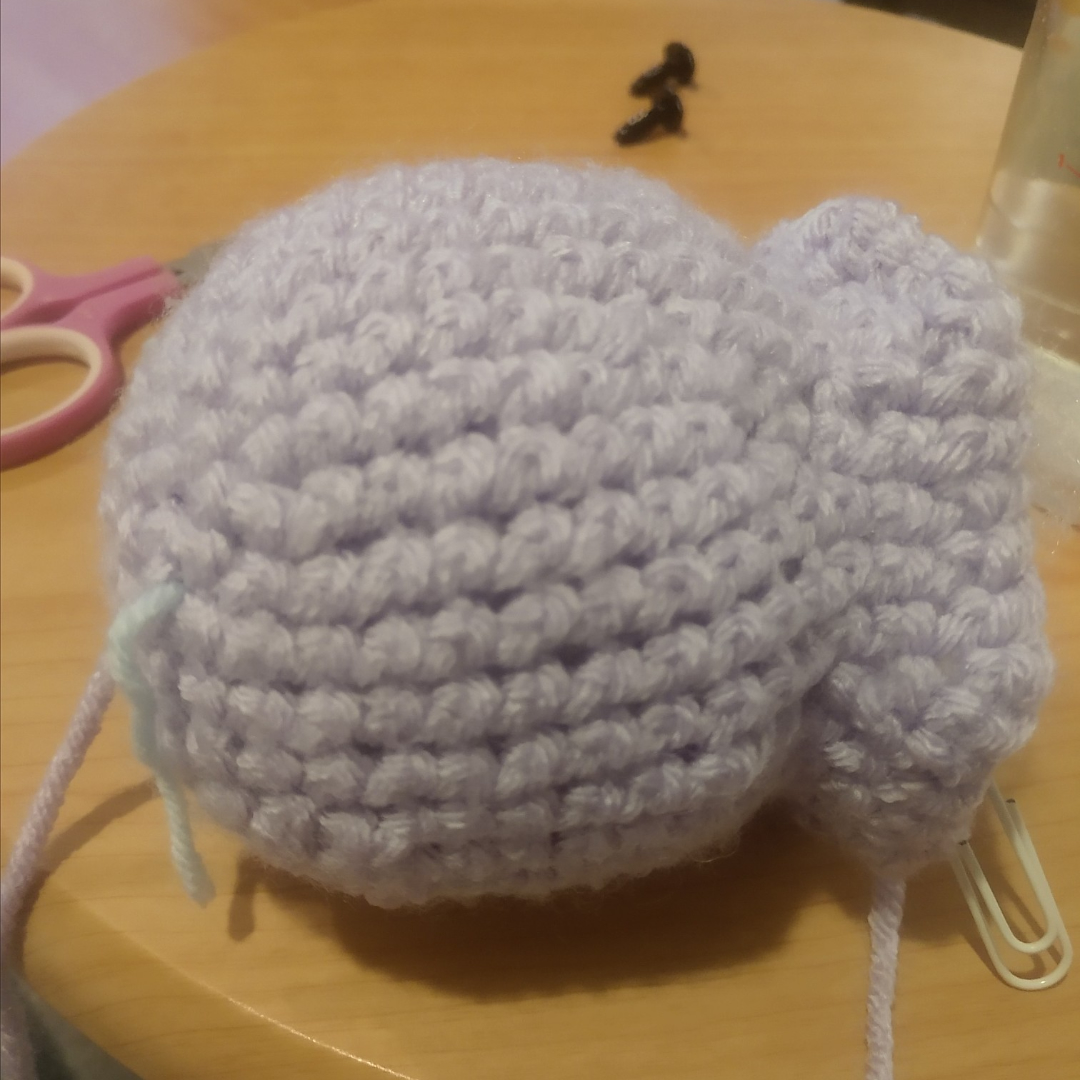
Head:
Work in Main Body color.
Round One: 6 Sc in Magic Ring (6).
Round Two: Inc all around (12).
Round Three: Inc, Sc all around (18).
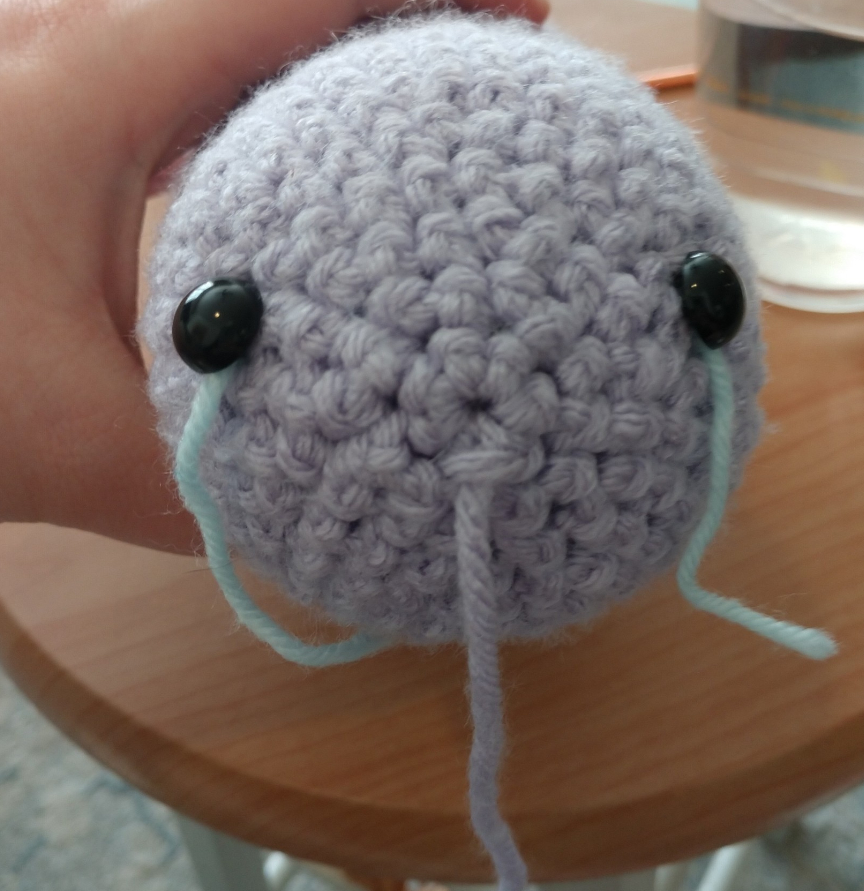
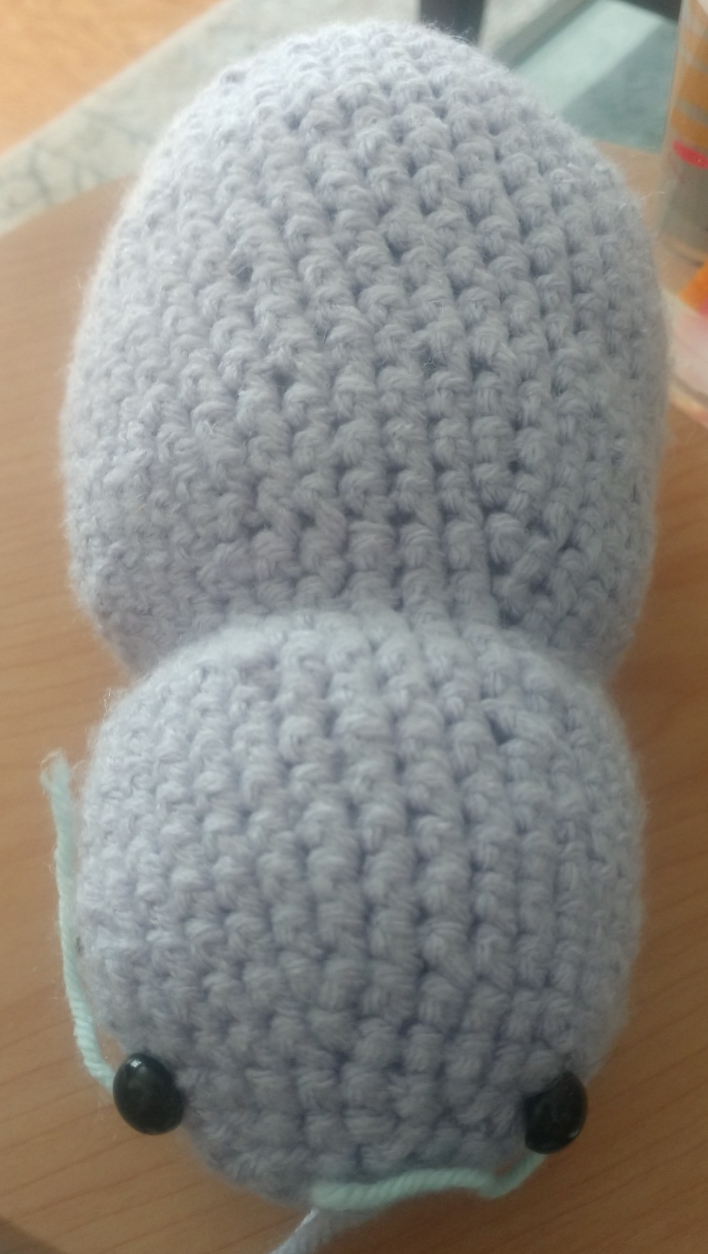
Round Four: Inc in first stitch, Sc in next 2 St, Inc in next St, Sc in next St, Sc in next St, then add stitch marker (or separate color string of yarn) in St you just made. This is where you’ll place one of your fluffy’s eyes. Inc in next St, Sc in next 4 St, Inc in next stitch, Sc in next St, Sc in next St and then add stitch marker (or separate color string of yarn) in St you just made. This will be the location of the fluffy’s second eye. Inc in next St, Sc in last 2 St (24).
Round Five: Inc, Sc 3 all around (30).
Round Six: Inc, Sc 4 all around (36).
Round Seven-Thirteen: Sc all around (36).
Round Fourteen: Dec, Sc 4 all around (30).
Round Fifteen: Dec, Sc 3 all around (24).
Round Sixteen: Inc, Sc 3 all around (30).
Round Seventeen: Inc, Sc 4 all around (36).
Round Eighteen: Inc, Sc 5 all around (42).
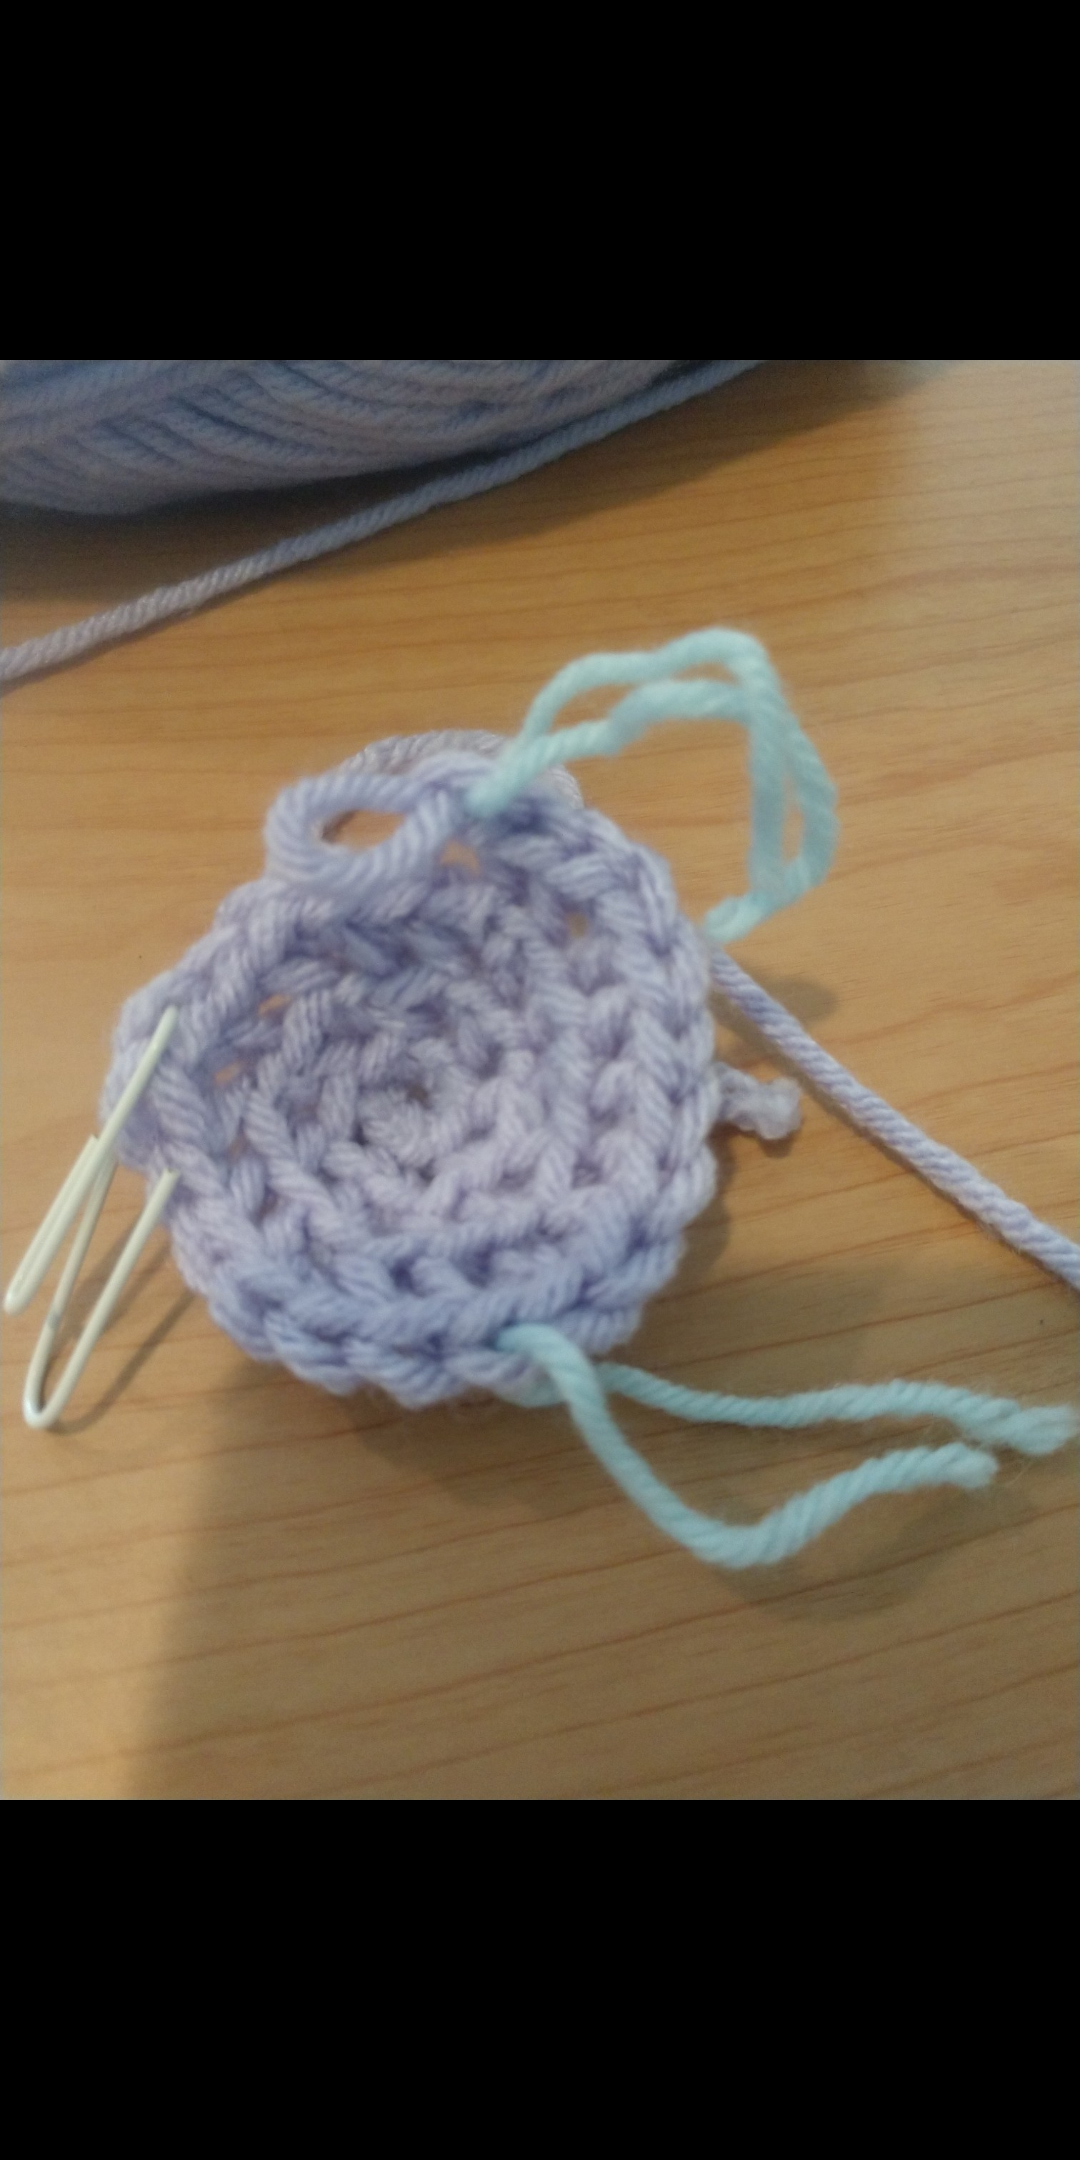
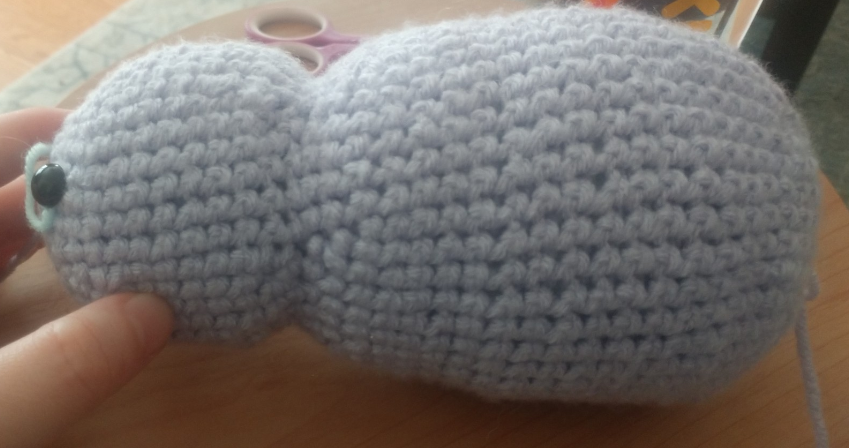
If you’re using safety eyes, remove the stitch markers/ extra yarn and add the safety eyes here. If you’re using sew-ons or buttons, leave the stitch markers/excess yarn in place.
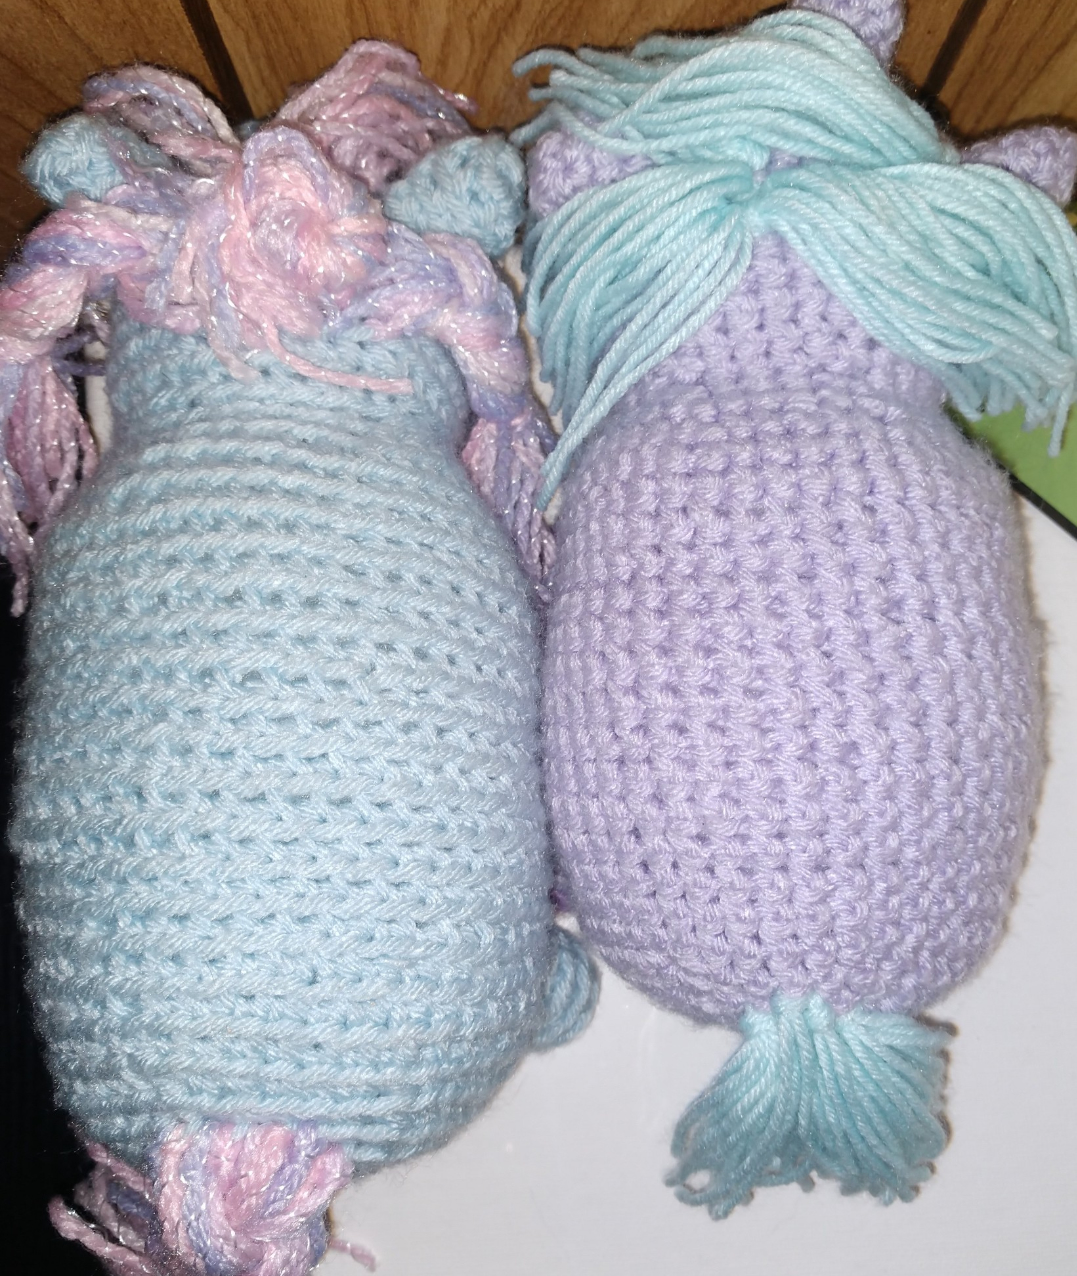
Turn the work inside out (optional). This step is a matter of preference. If you like the stitch pattern look of the blue fluffy, turn the work inside out. If you prefer the stitch pattern purple fluffy, do not turn it inside out.
Stuff the fluffy head. The stuffing should be firm enough that the head maintains its shape, but not so over-stuffed that the stuffing is visible through the stitches.
Neck and Body
Continue from the Head.
Round Nineteen-Thirty-Four: Sc all around (42).
Round Thirty-Five: Dec, Sc 5 all around (36).
Round Thirty-Six: Dec, Sc 4 all around (30).
Round Thirty-Seven: Dec, Sc 3 all around (24).
Round Thirty-Eight: Dec, Sc 2 all around (18).
Stuff the body. Make sure your fluffy is as firm/squishy as you like at this point, including the head.
Round Thirty-Nine: Dec, Sc all around (12).
Round Forty: Dec all around (6).
Add any extra stuffing you made need. Finish off. Sew closed. This will be your fluffy’s backside.
Nose
In Main Body color OR Snout Color
Round One: Ch 5 (5).
Round Two: Sc in second Ch from hook. Sc in the same St, Sc in next 2 St, Inc twice in next St. Turn to the other side of the Ch, Sc in next 2 St, Inc in last St (12).
Round Three: Inc in next 2 St, Sc in next 3 St, Inc in next 3 St, Sc in next 3 St, Inc in last St (18).
Round Four-Six: Sc all around (18).
Finish off. Leave a long tail (3-5 inches) for sewing. Turn inside out (if you prefer the blue fluffy stitch pattern) and stuff. Pin to fluffy head with straight pins.
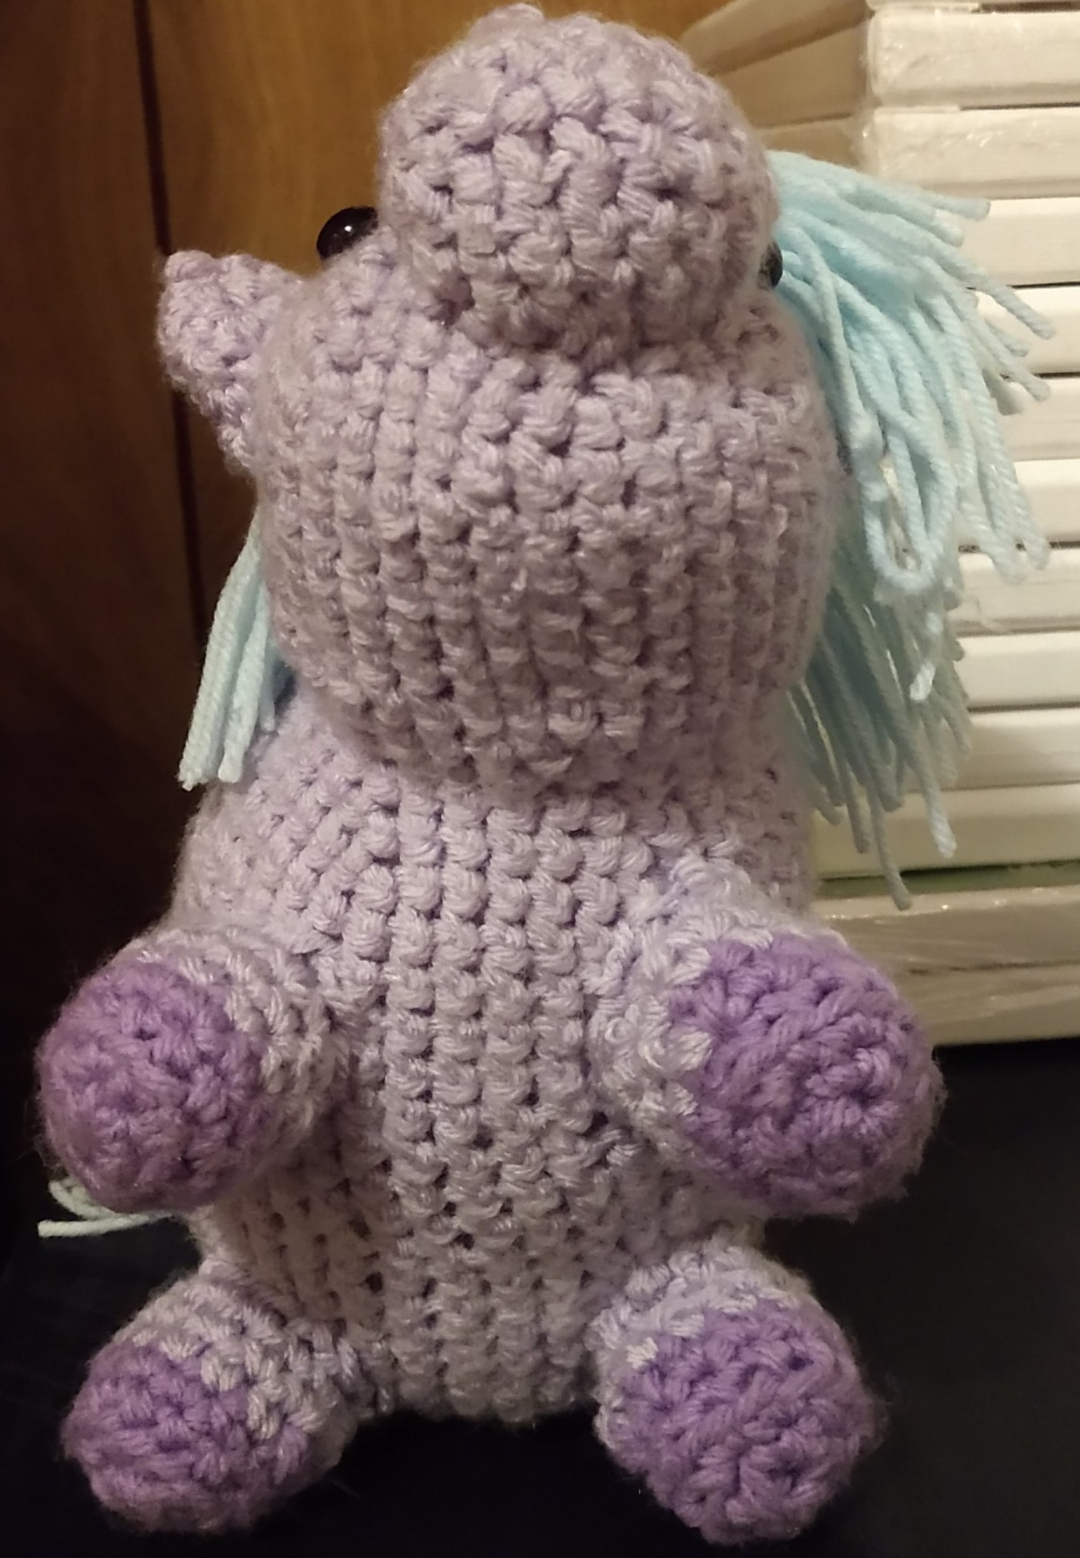
Ears
In Main Body Color
Make Two
Round One: 6 Sc in Magic Circle
Round Two: 2 Sc in next Sc, Sc in next St all around (9).
Round Three: Sc all around (9).
Round Four: 2 Sc in next Sc, Sc in next 2 Sc all around (12).
Round Five: Sc in each Sc around (12).
Finish off and leave a long tail (3-5 inches) for sewing. Turn inside out. Stuff ears with spare yarn or a small amount of stuffing. Pin to head.
If you want slightly taller/wider ears, you can follow this pattern a bit further, but I don’t recommend it because the ears start to look similar to horns.
To Make Taller and Wider Ears (optional)
Round Six: 2 Sc in first Sc, Sc 3, all around (15).
Round Seven: Sc all around (15).
Follow this pattern from lines six and seven, adding three stitches to your total stitch count with each repetition, until ears are your desired size. Finish off, leave a long tail (5-6 inches) for sewing, stuff, and pin to head.
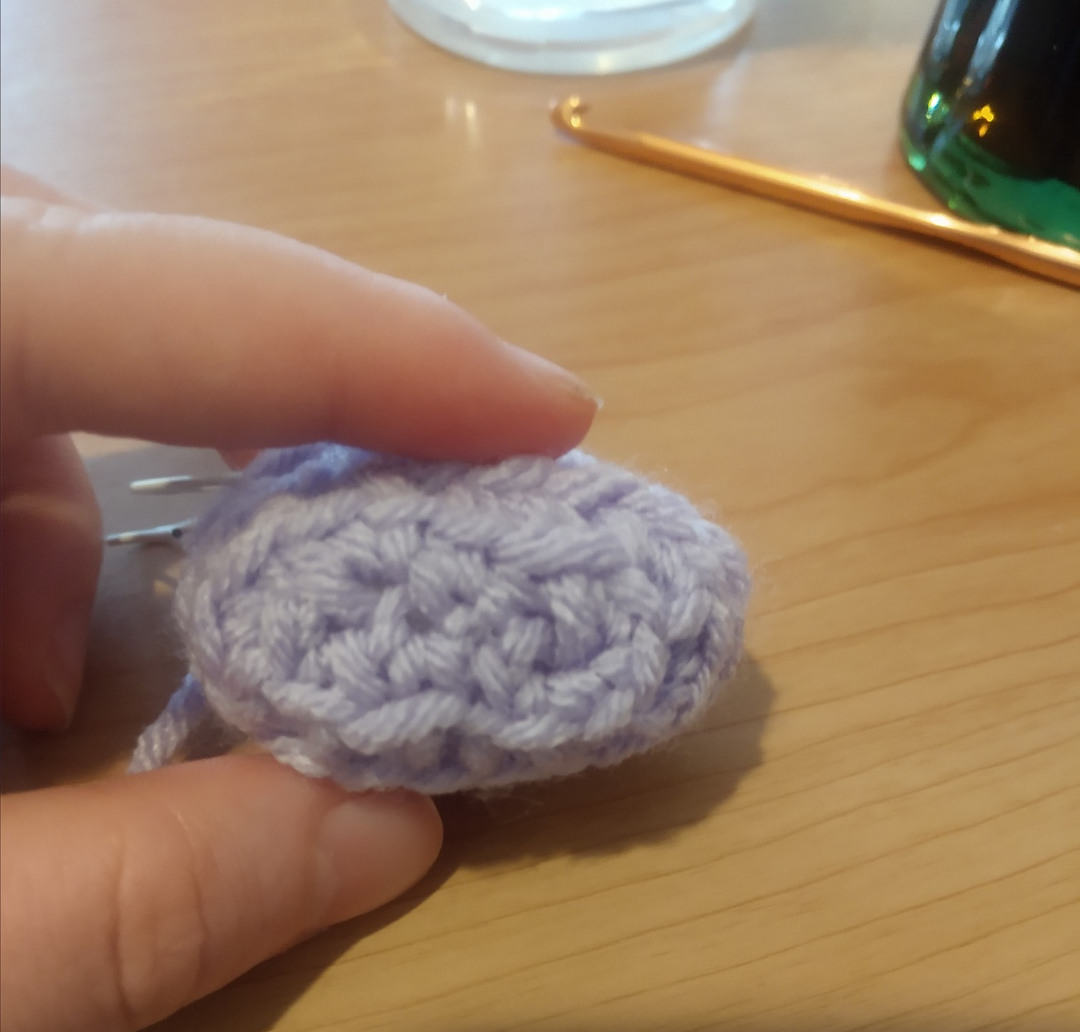
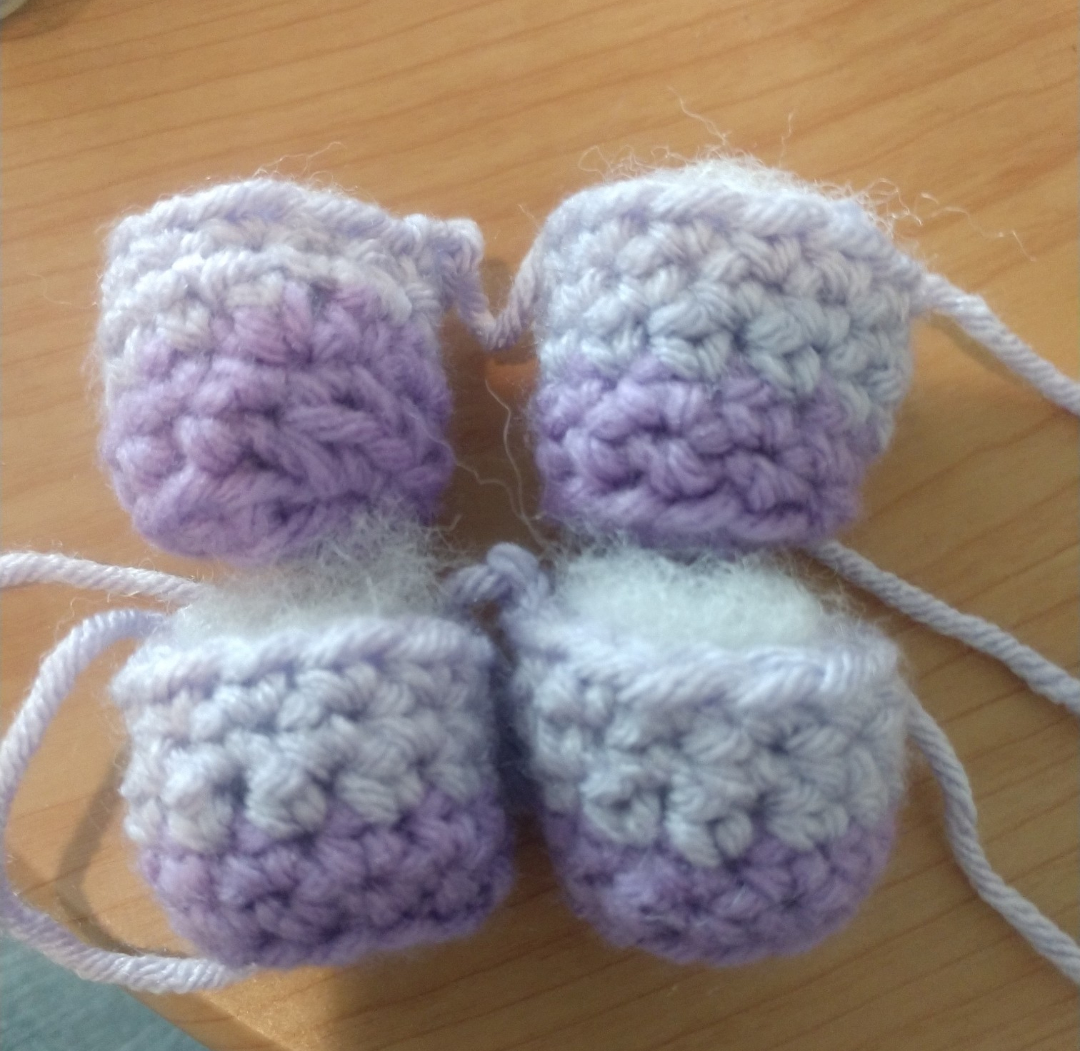
Legs
In Hoof Color OR Body Color
Make Four
Round One: 6 Sc in Magic Circle (6).
Round Two: Inc all around (12).
Round Three: Sc around in BLO (12).
Round Four: Sc all around (12).
Round Five-Seven: Switch to Body Color (if not using Body Color already), Sc all around (12).
Finish off and turn the piece inside out (optional). Stuff. Leave a long tail (5-6 inches) for sewing. Arrange the limbs however you like and pin to the bottom of the body. Make sure your fluffy can stand before you continue.
Horn (Optional)
Round One: 6 Sc in Magic Circle (6).
Round Two-Three: 6 Sc all around (6).
Round Four: Inc, Sc all around (9).
Round Five: Sc all around (9).
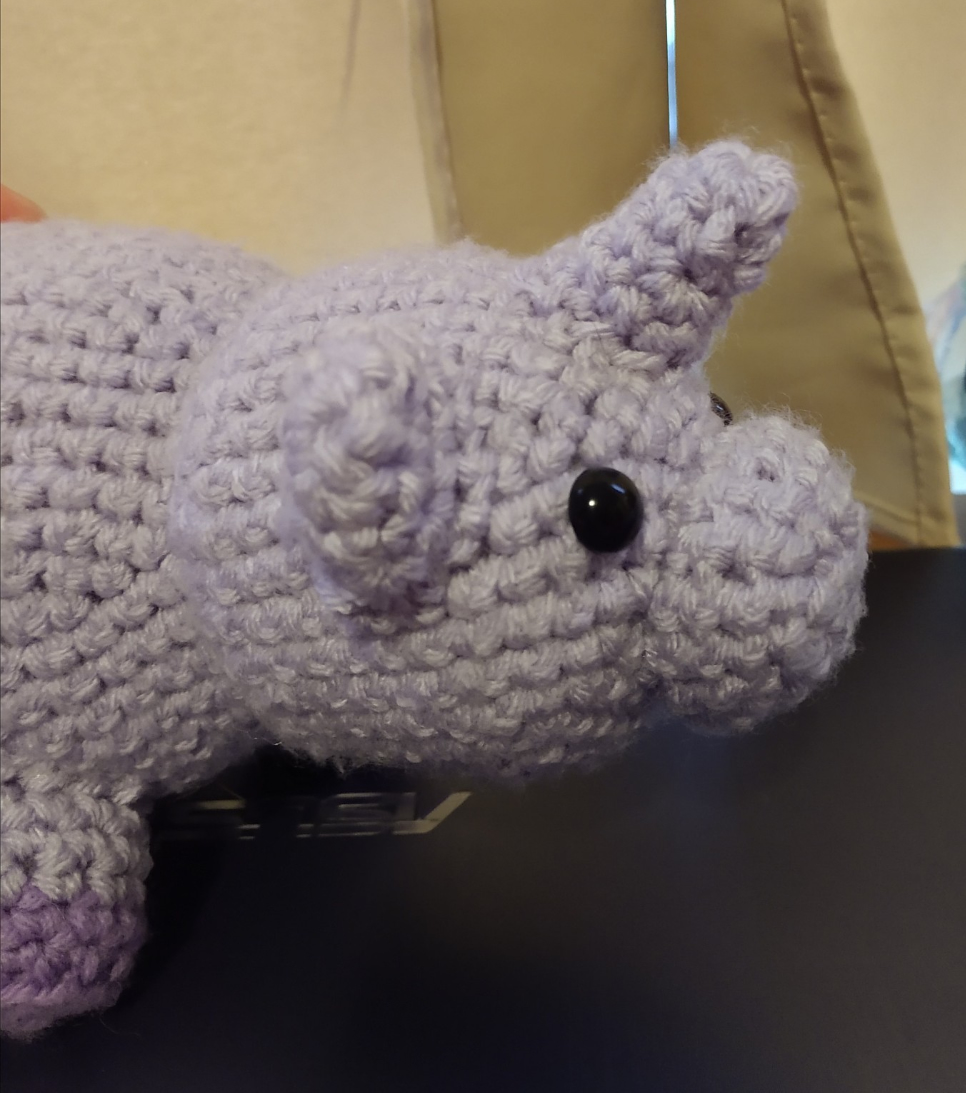
This will create the small horn that is pictured. If you want a longer horn, follow a few more lines of the pattern below.
Round Six: Sc all around (9).
Round Seven: Inc, Sc 2 all around (12).
Round Eight-Eleven: Sc all around (12).
Turn inside out. Fasten off, and leave a long tail (3-5 inches) for sewing.
Sewing It All Together
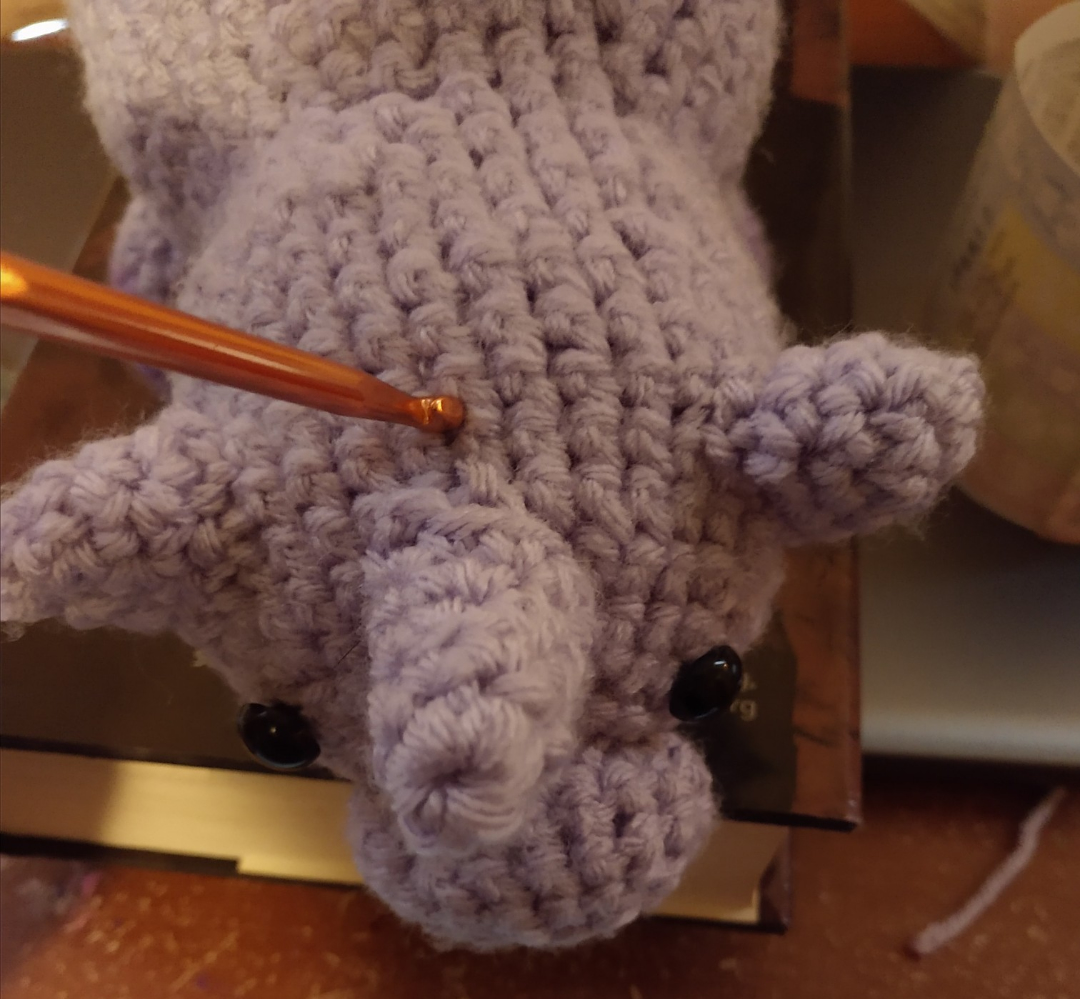
Now we can start assembling the fluffy! I recommend sewing on the legs first, then the ears, and finally the snout. Sew the pieces together using the long tails you left attached to the pieces and a tapestry needle. Make the stitches moderately tight, in case you wash your fluffy in a washing machine. Sew on the sew-on eyes or buttons, if needed. I’ll add a video that teaches you how to sew together/join pieces here: Amigurumi Patterns: How to Join Pieces - YouTube
If you’re making an alicorn or unicorn, pin your horn and sew it on now.
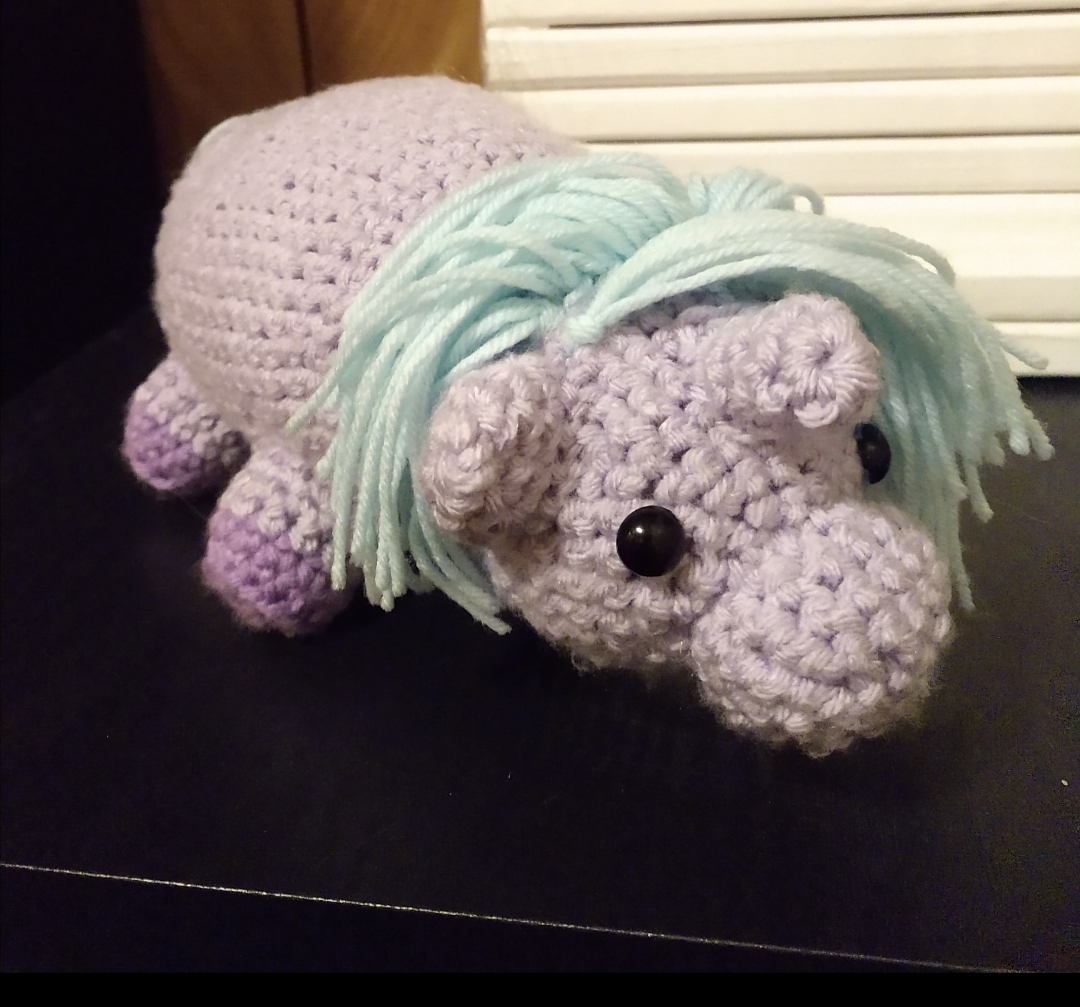
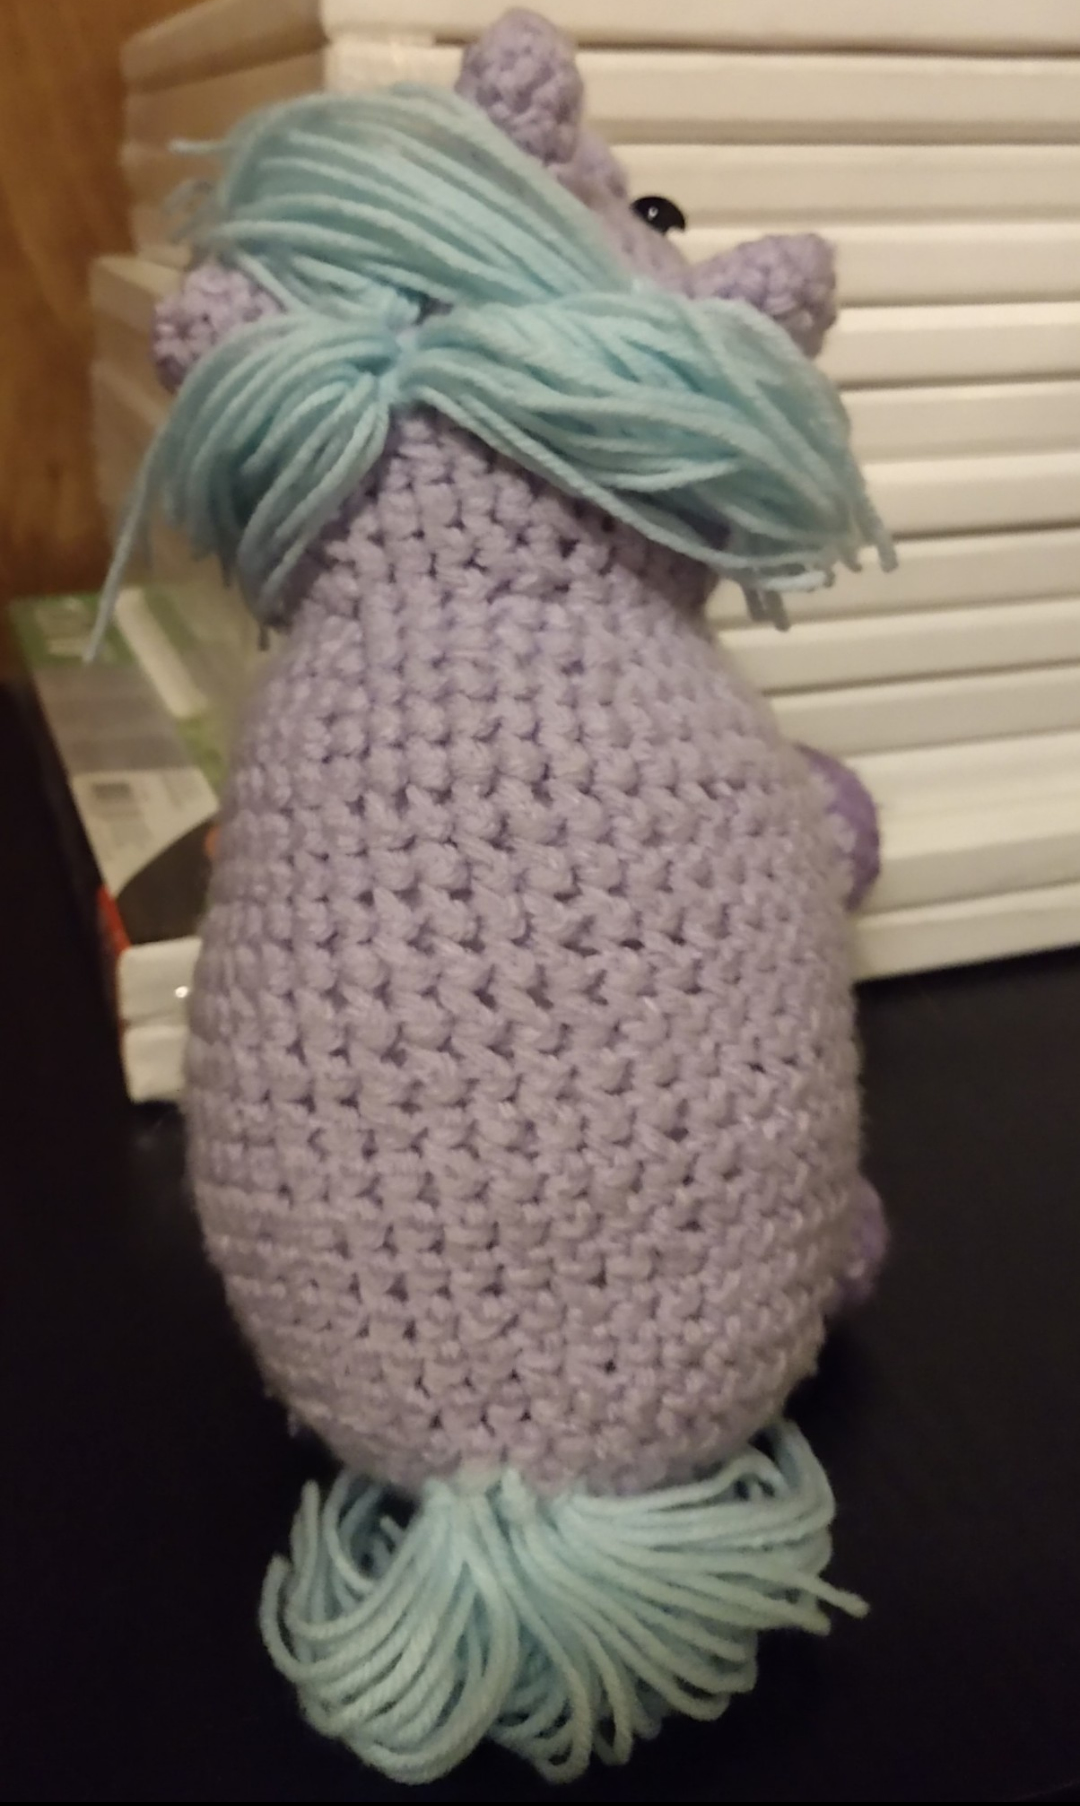
Mane
In Mane and Tail Color
This process is pretty simple, and since it depends entirely on how you want your fluffy to look, I’ll give you basic instructions.
To begin with, decide how far forward you want your fluffy’s mane to come on its forehead. I find that the row that is even with the edge of the fluffy’s ear is a good starting point. Remember, this is all a matter of preference, and you can always go back and add more rows of mane.
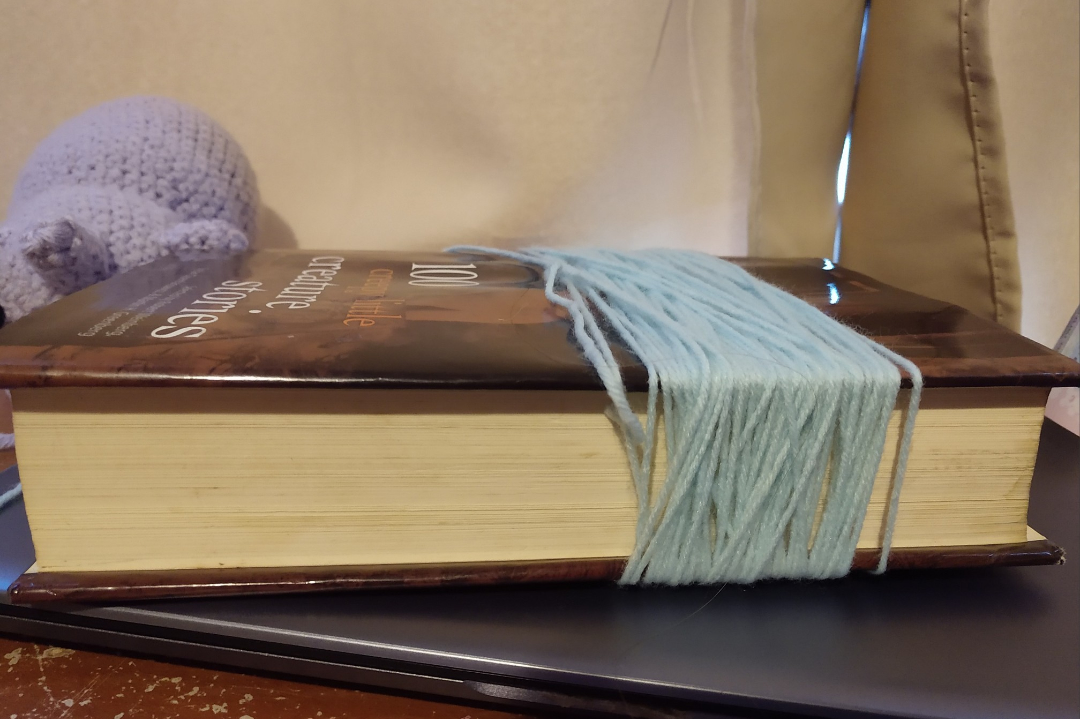
In order to make strands of hair for the mane, you will have to cut multiple strings to the same length. I accomplish this by wrapping a fair amount of yarn around a book, like this.
Then I cut the strands that are drawn taut across the pages of the book. Try to cut as straight down the middle as possible!
Now that we have that done, we can drape it across the fluffy’s head. Don’t worry about styling it, this is just to get an idea of the length. As you can see, these strings are super long, much longer than what I want for this fluffy!
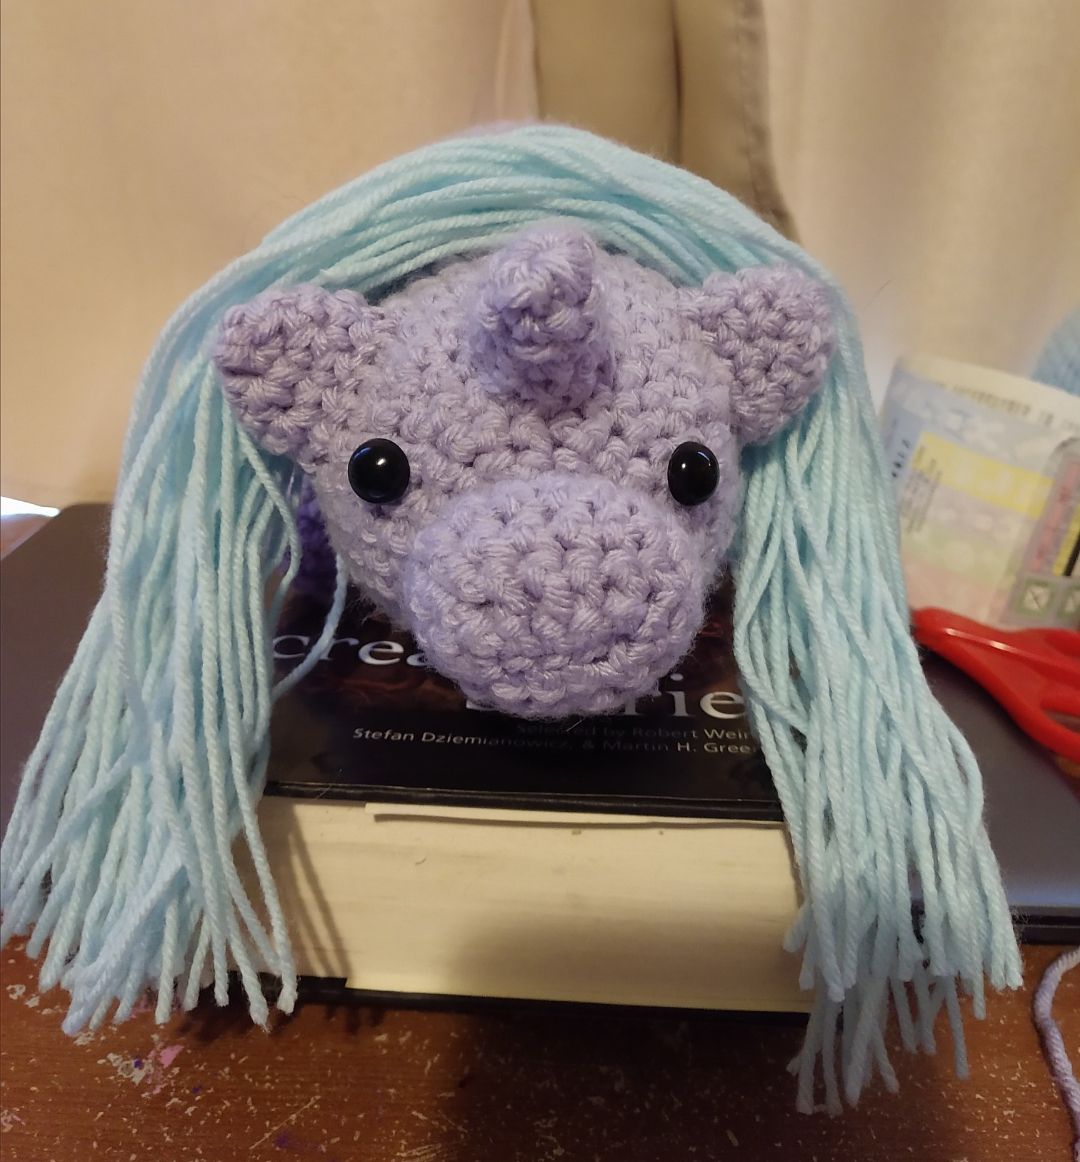
You can get an idea of how long this will be on the fluffy by taking a single strand, folding it in half, and placing it on a middle stitch on the fluffy’s head. Here is an example.
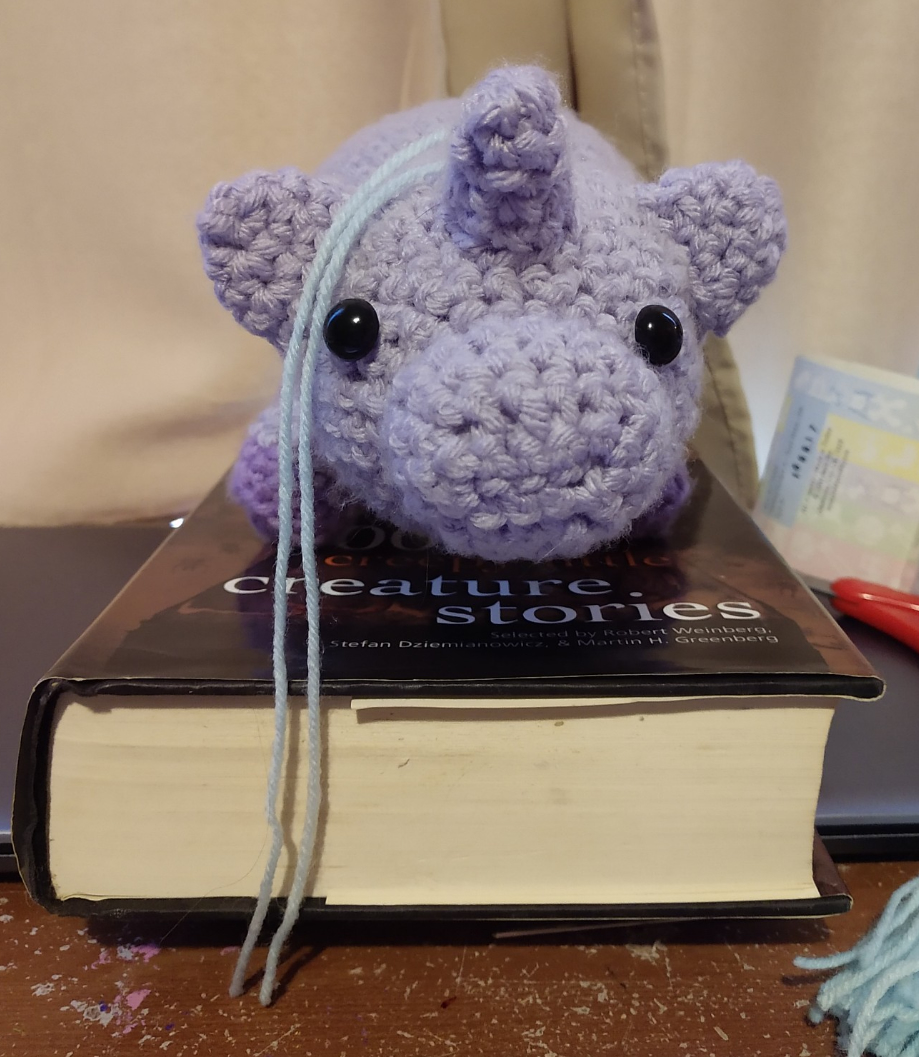
For my purpose, this is too long, however, if you want your fluffy to have longer hair, or you wish to cut and style it after its been sewed in, you can skip these next few lines.
In order to remedy this, I will fold the entire bundle in half and cut them along the bend. That will leave me with more manageable strands, like this.
Now we can start stitching in the mane. I will add a video to make this easier to understand.
Video: How to add hair to Amigurumis in an easy way - Beginners guide - YouTube
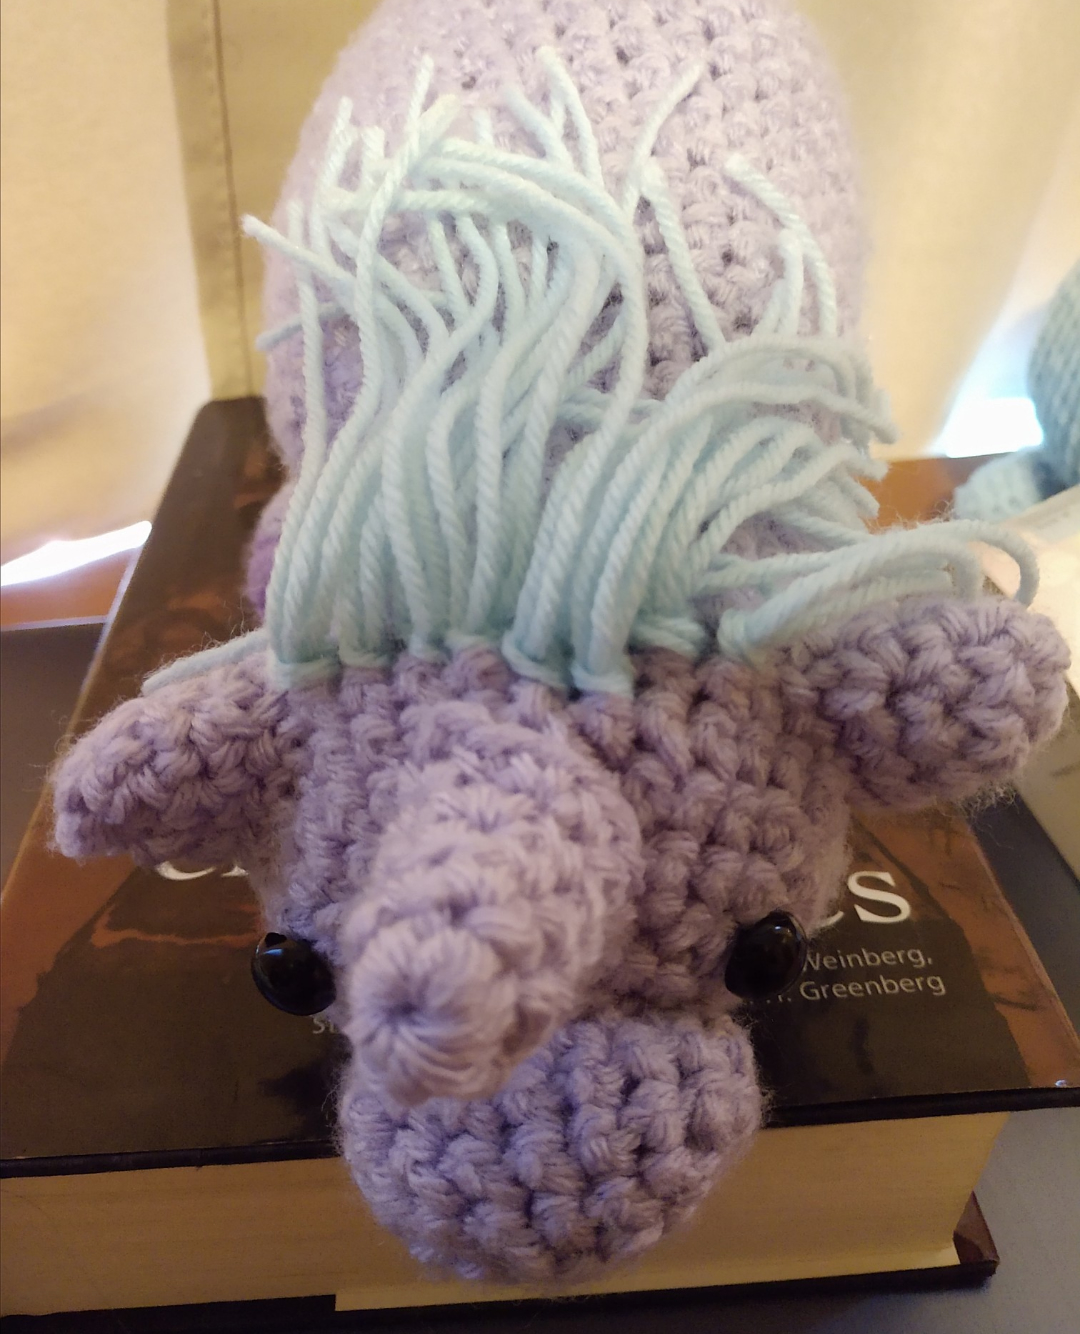
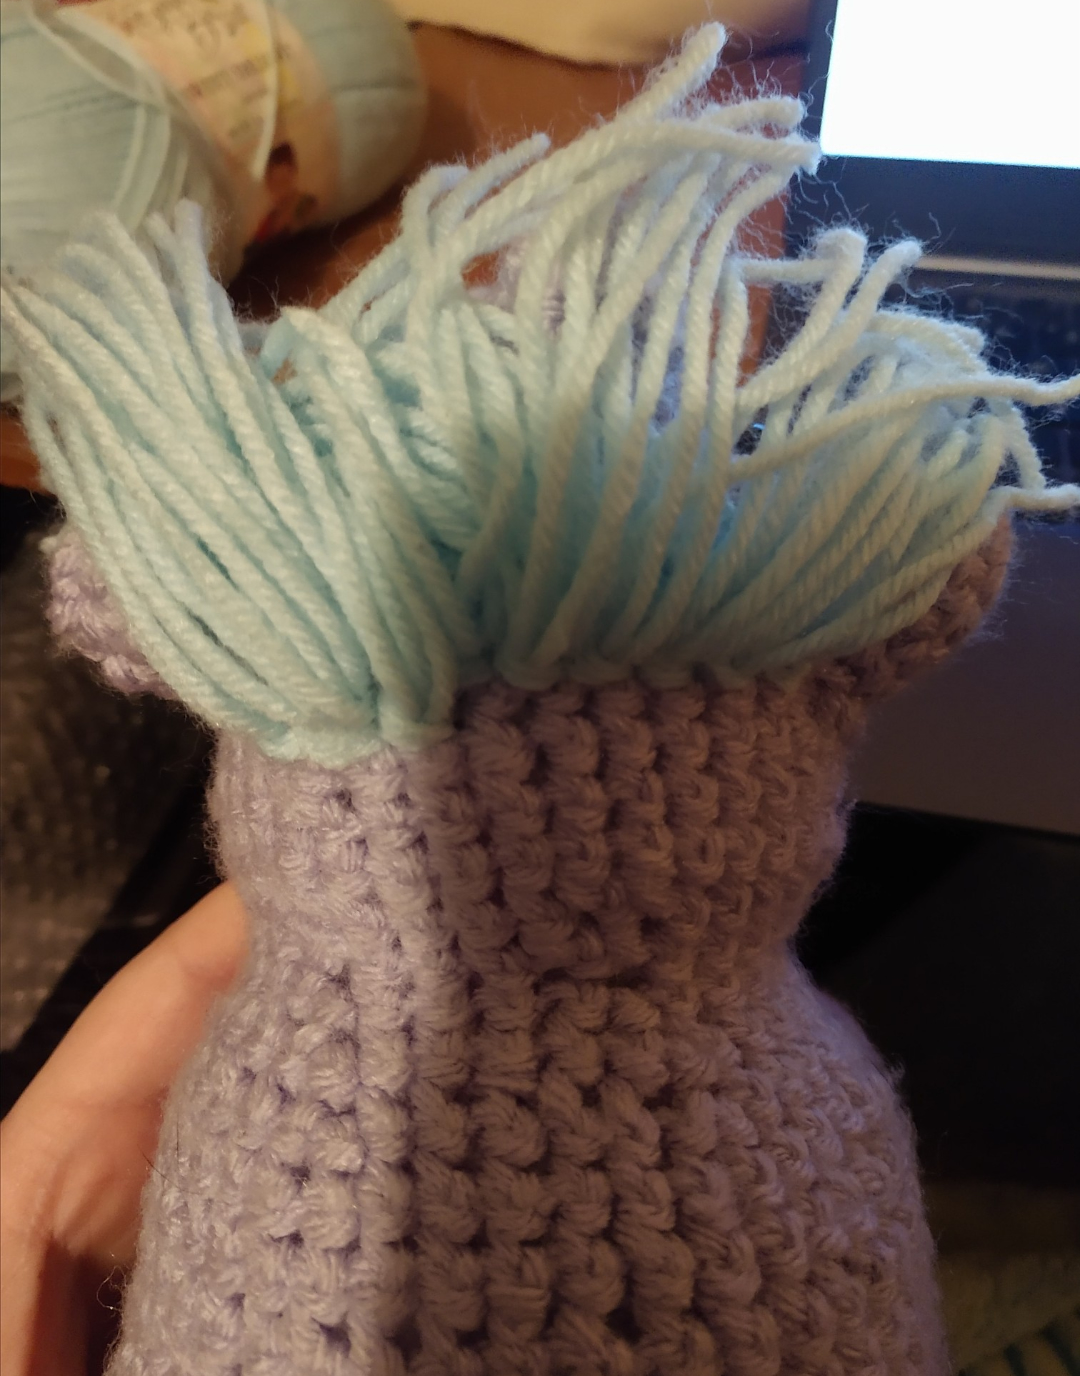
I will begin with this row and stitch.
In order to add hair, push your hook beneath the Body Color stitch you want your string to be attached to. You can use the vertical or horizontal Body Color stitches, I typically use the vertical stitches. Push the hook out of the other side of the stitch. Take 1-3 pieces of your yarn mane, fold them in half, and put the bend on the hook. Pull through slightly, leaving most of the strands hanging outside of the stitch. Make a single crochet using these strands. Pull through, and then tighten them down. Congratulations, your fluffy has its first strand of hair! Continue this process until your fluffy has as much (or as little) mane as you desire.

Here is what my first row looks like. I will add a picture of a few styles you can do from just this one row!
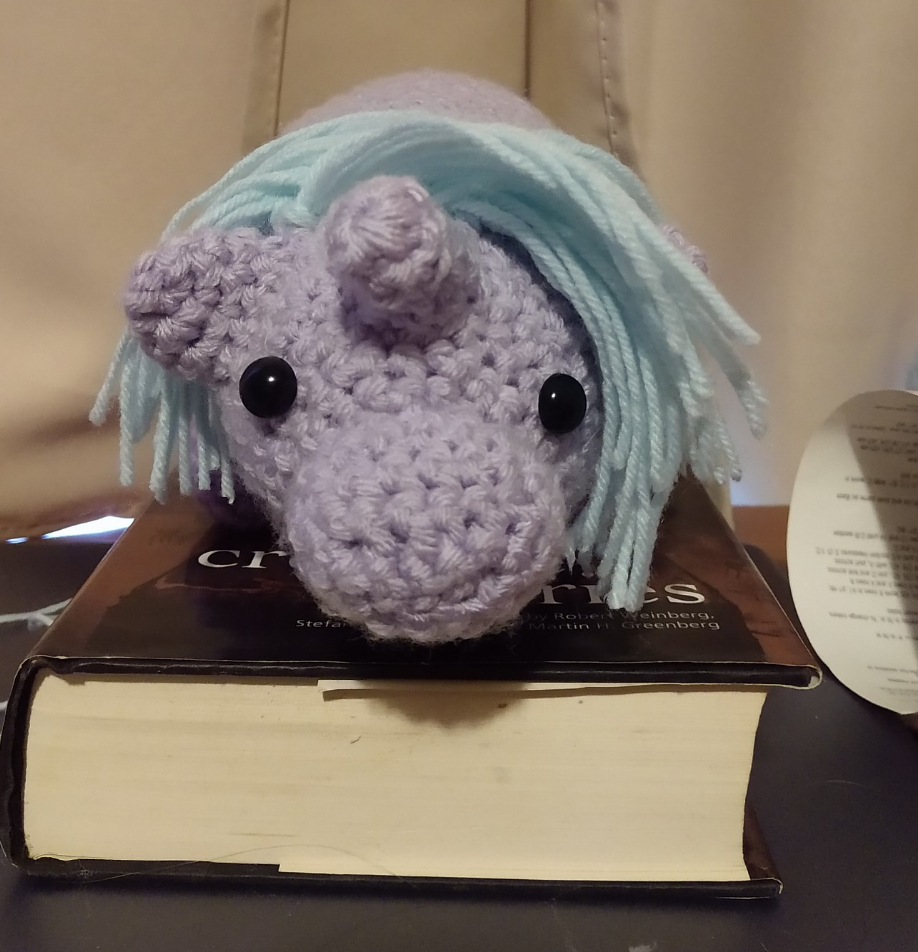
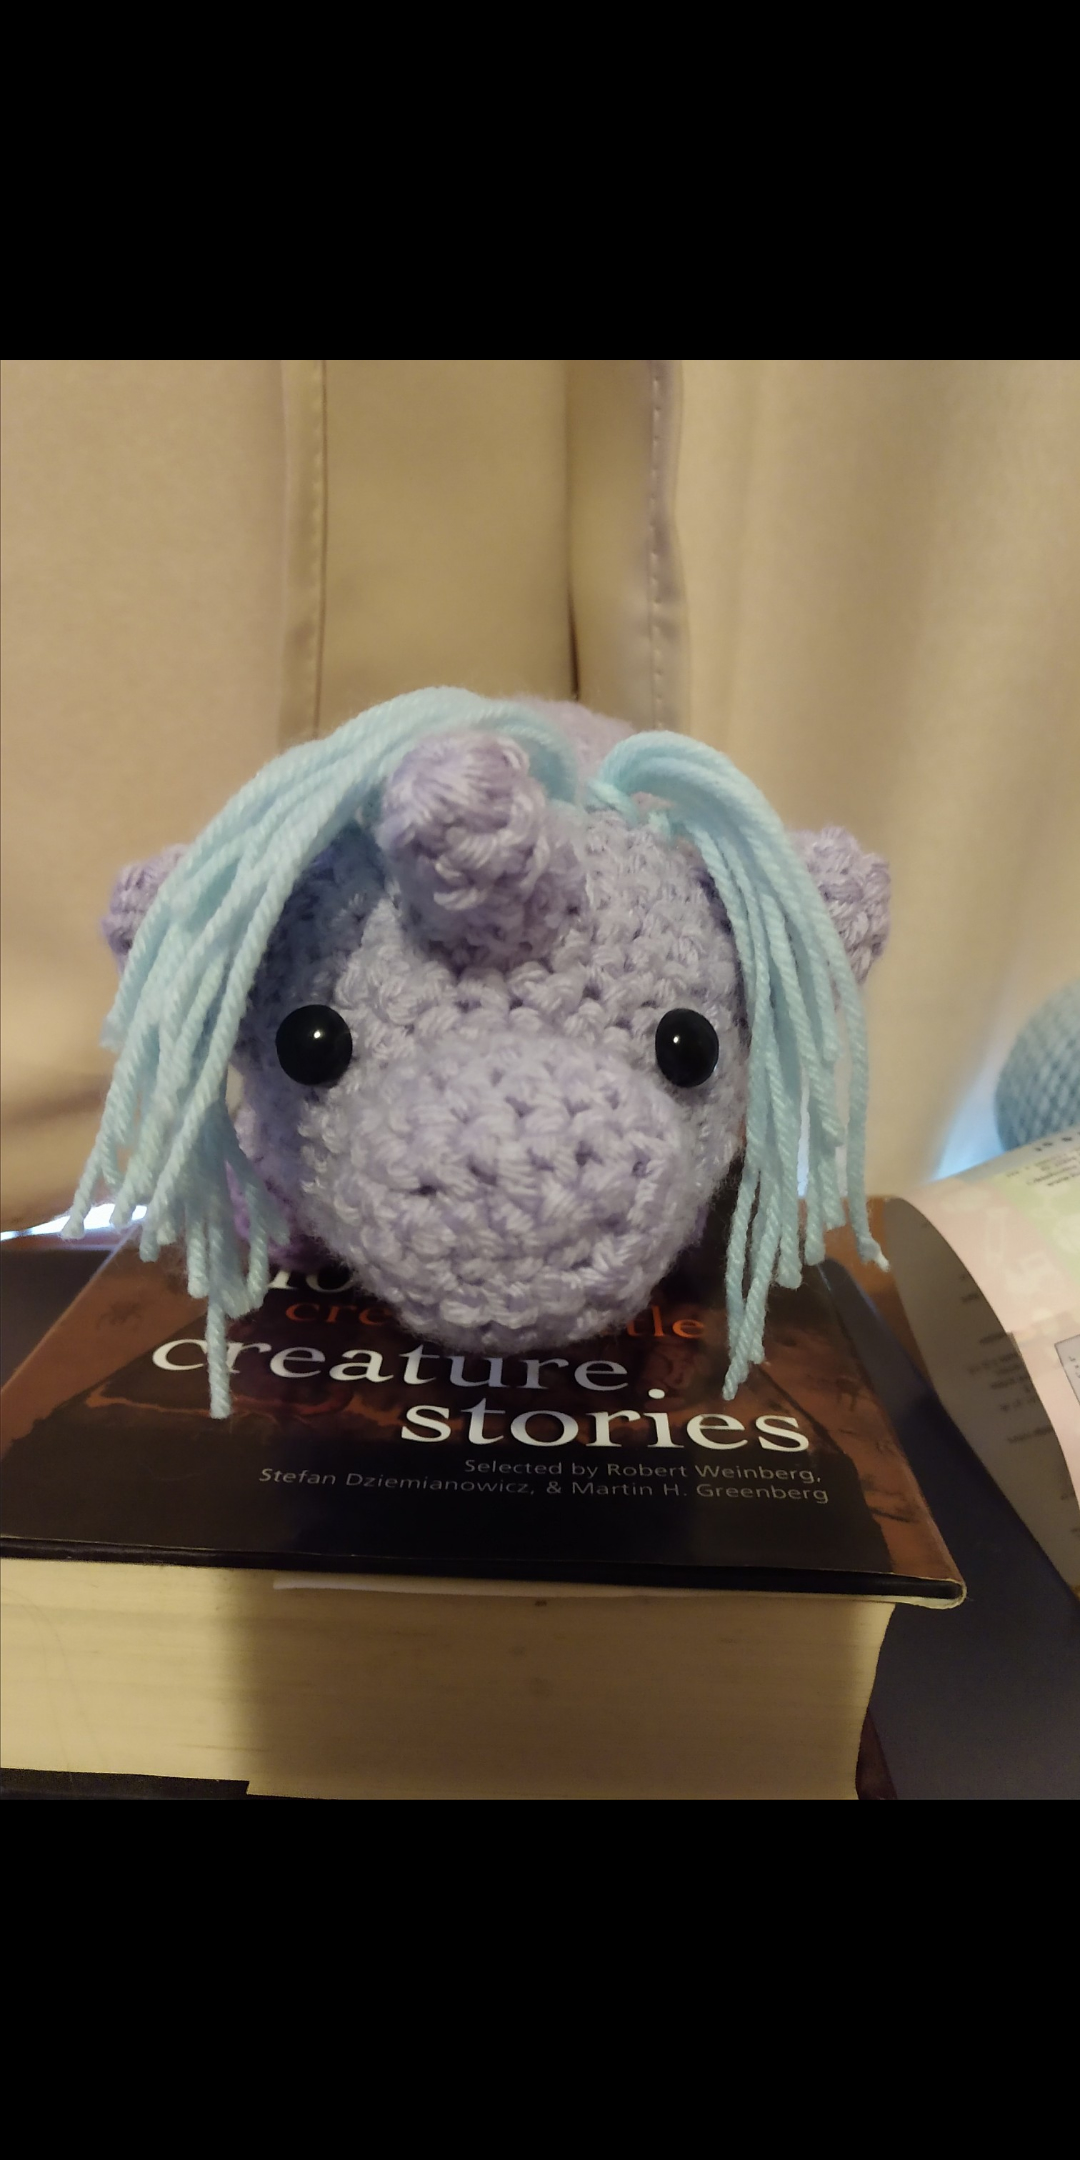
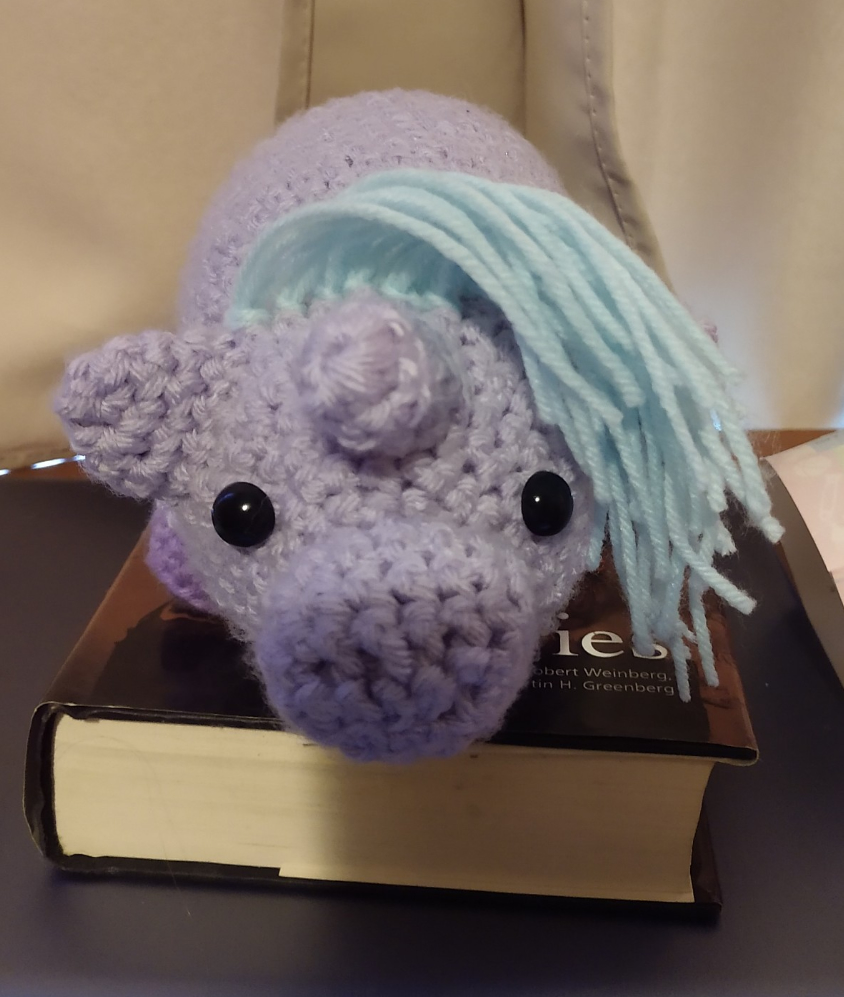
Of course, you’ll probably want at least two rows of yarn, just so the fluffy has a fuller mane. For this fluffy, I did 2 ½ rows of stitches, with 3 strands per Body Color stitch they’re attached to. Here’s a picture of the stitches used, and the final fluffy style.
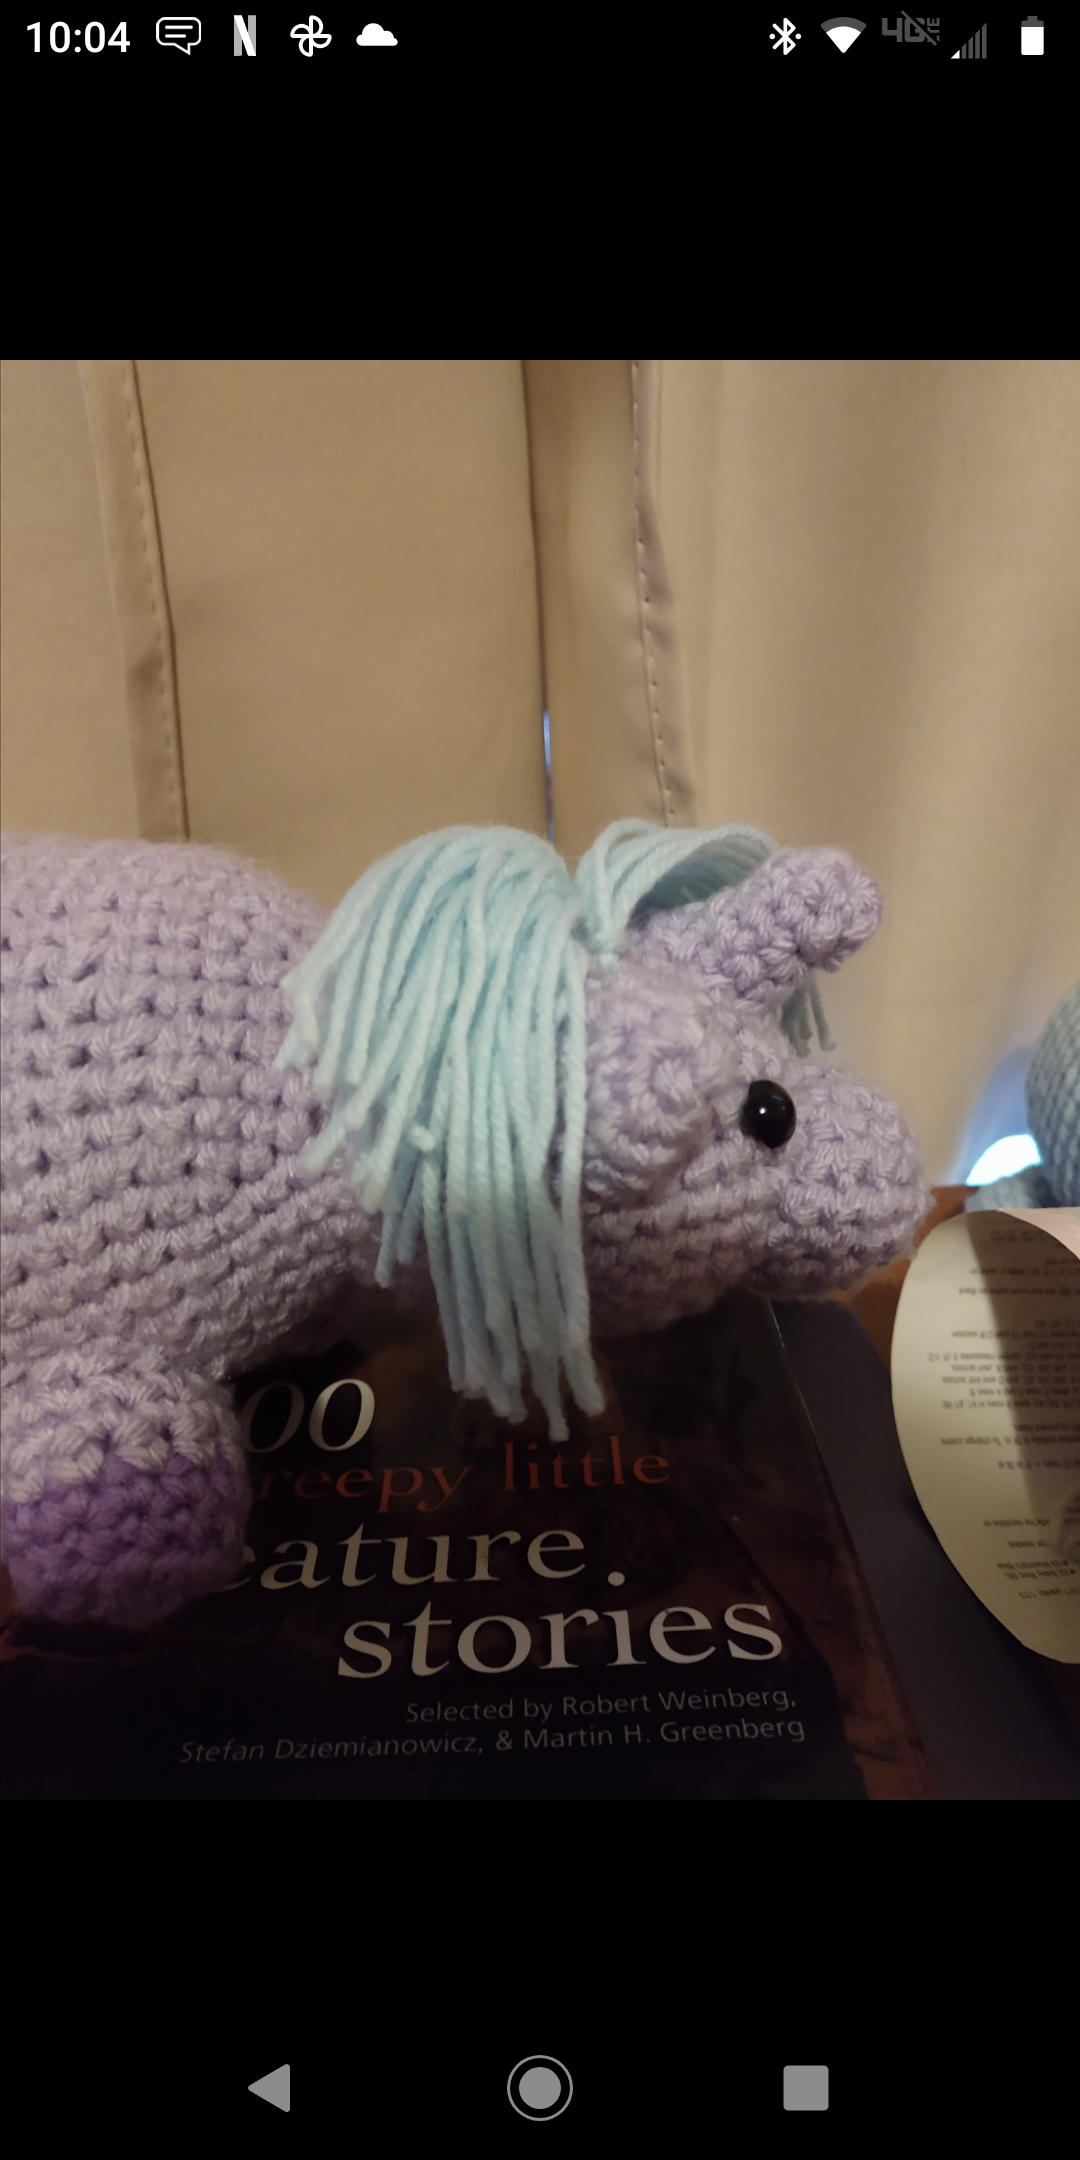
Remember, there is no wrong answer for your fluffy’s mane. It can go all the way to the fluffy’s neck, or down it’s back, and be styled or cut however you like! It is truly a matter of preference.
Style and cut your fluffy’s mane (you can use water and very small amounts of hair gel, hair spray, or mousse to make the style hold, but if you ever wash your fluffy, it could cause some fraying of the strands and will have to be re-styled).
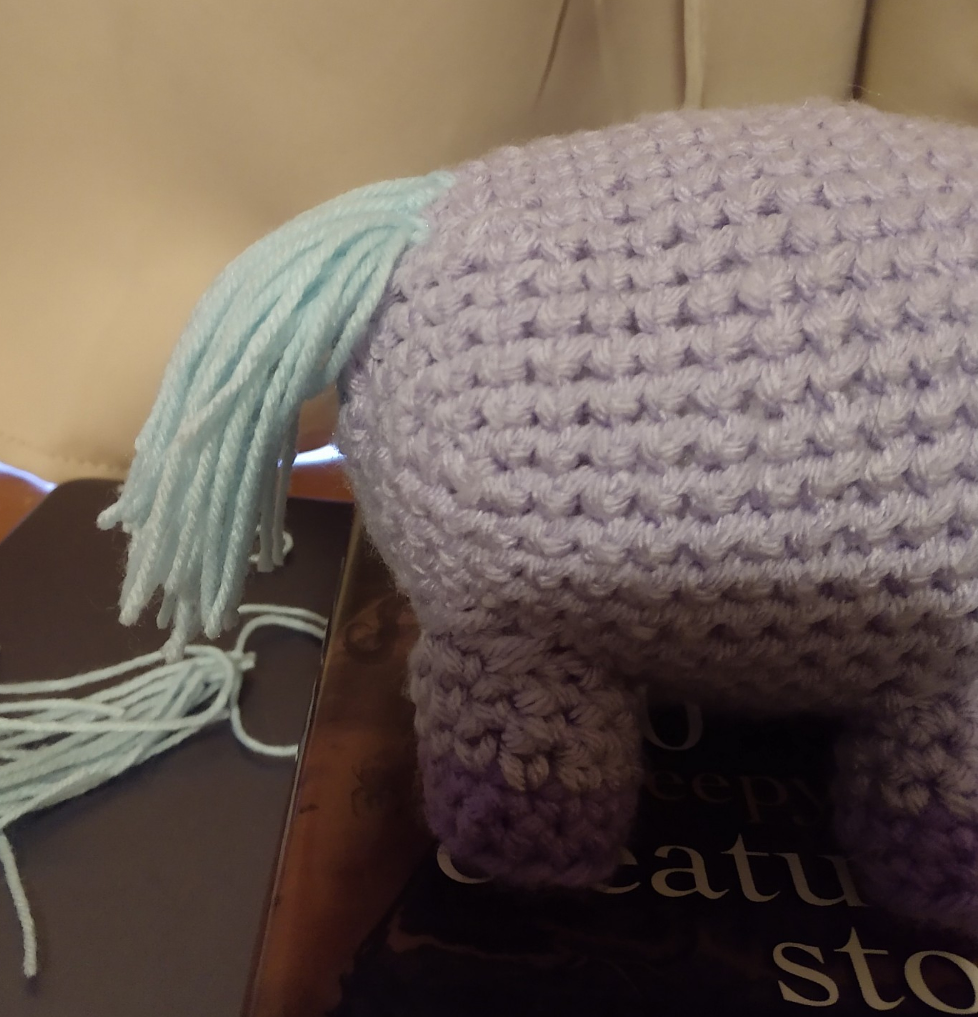
Tail
In Mane and Tail Color
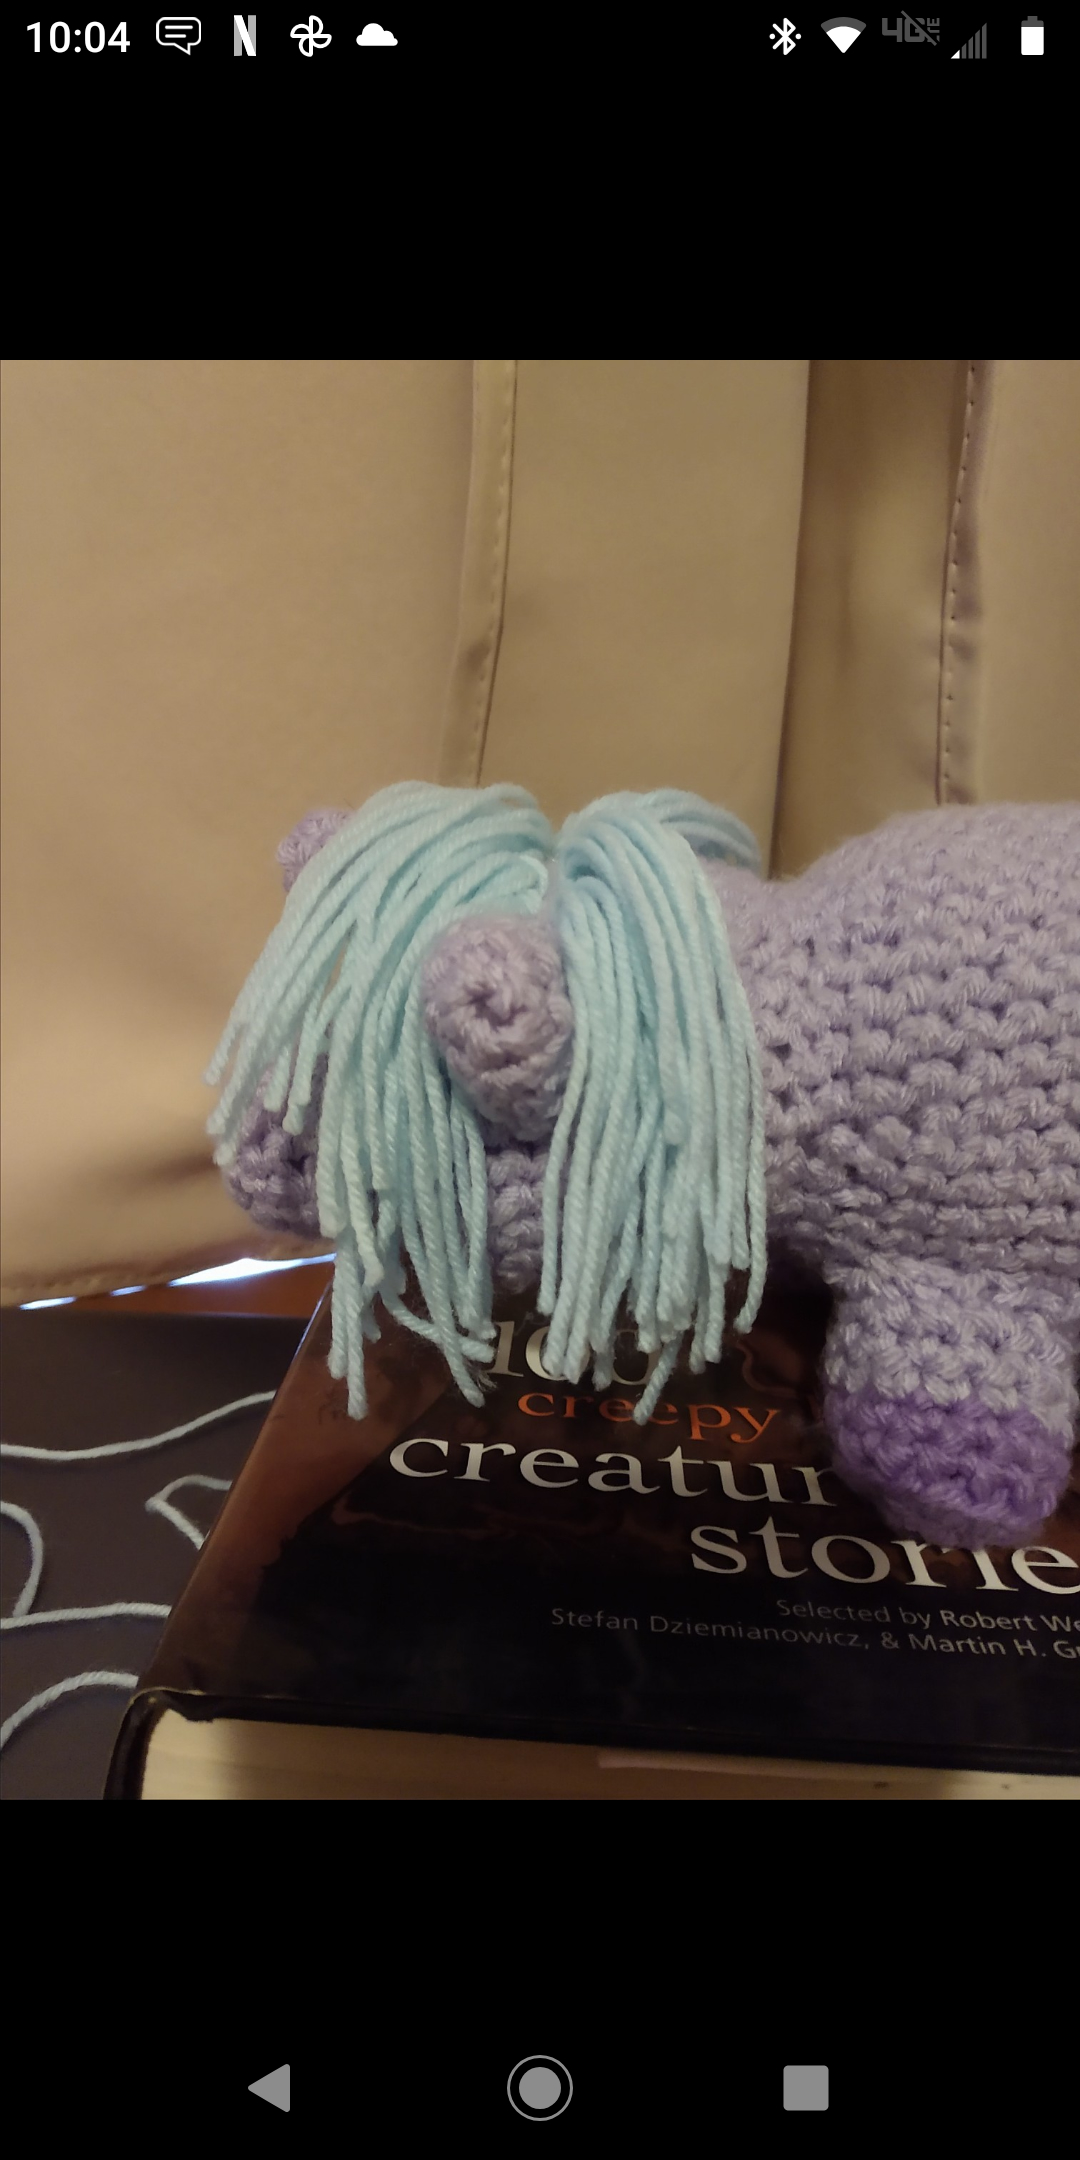
This process is just like making your fluffy’s mane, except you’re attaching it to the rump. I find that this stitch below is the best starting point for the tail.
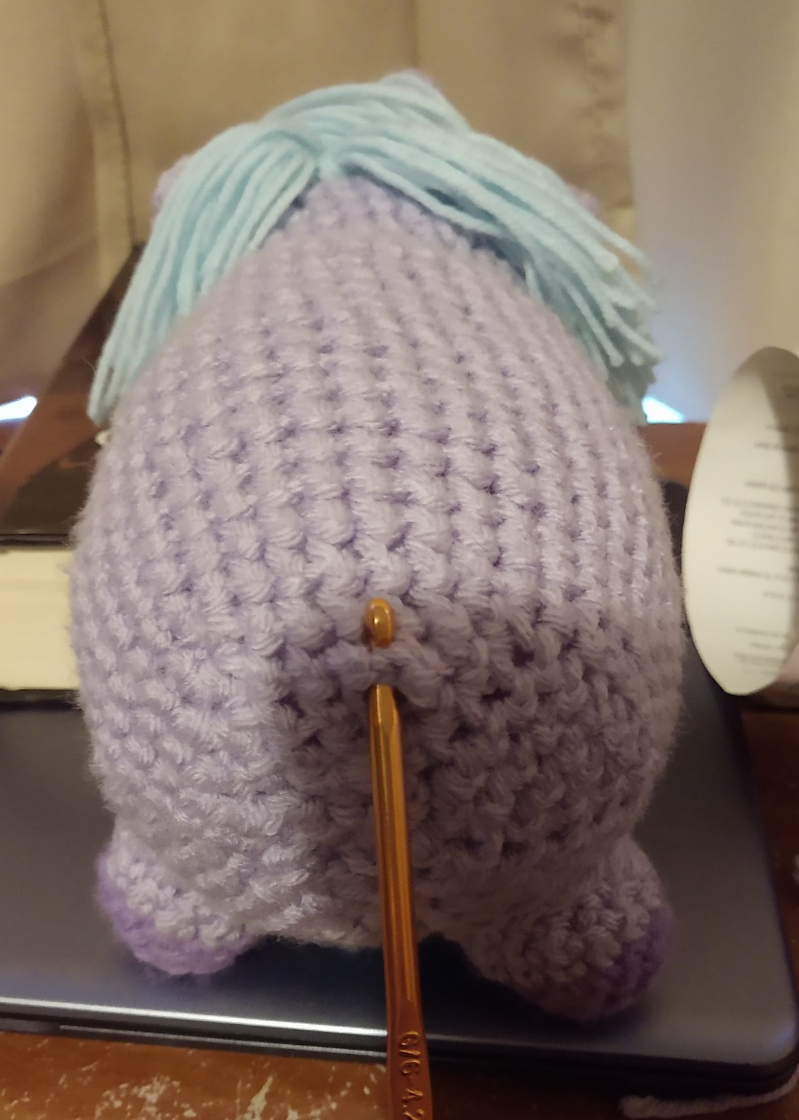
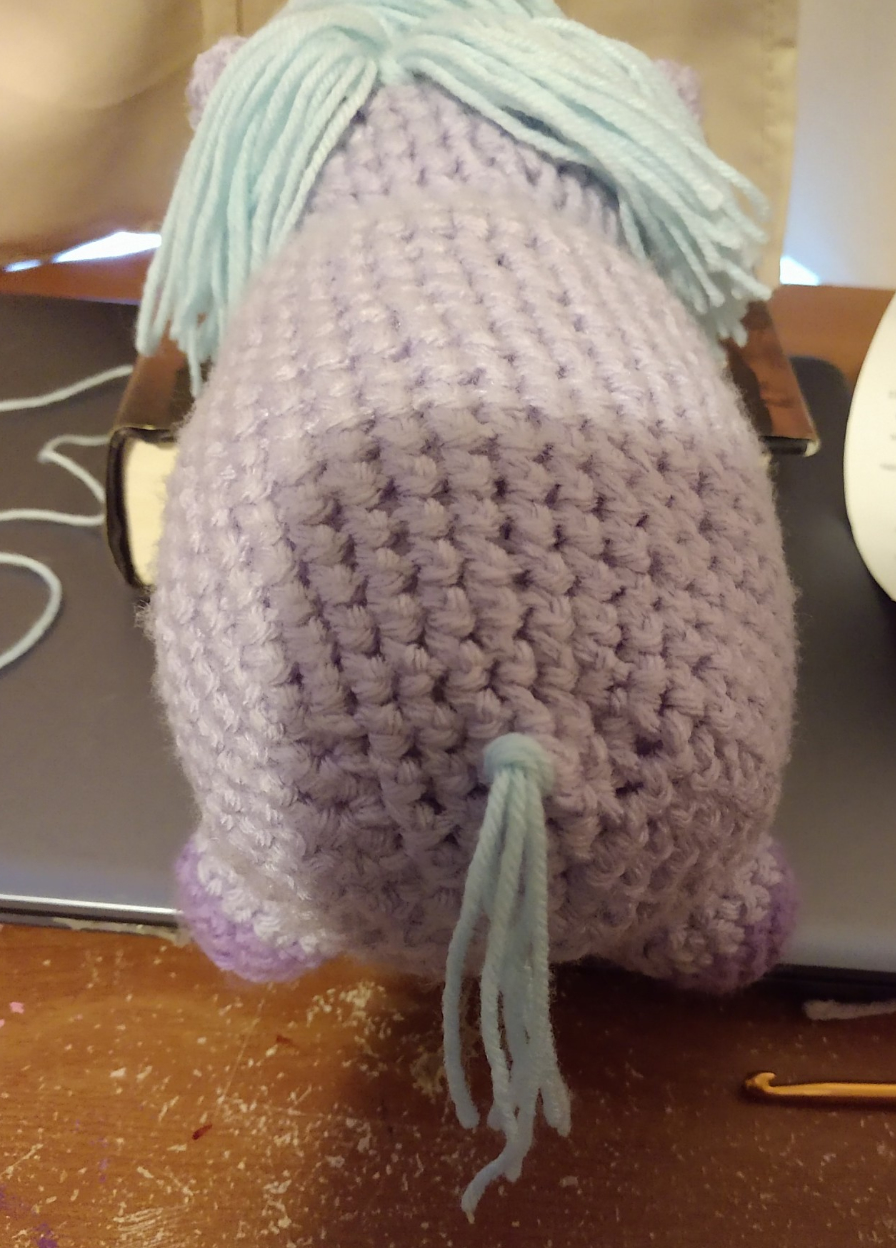
Do the same process as you did for the mane. I typically only use 3-5 Body Color stitches per row, but of course, this is a matter of preference as well. This is how my fluffy’s tail looks using 4 rows of stitches, 3 stitches per row, and three strands per stitch.
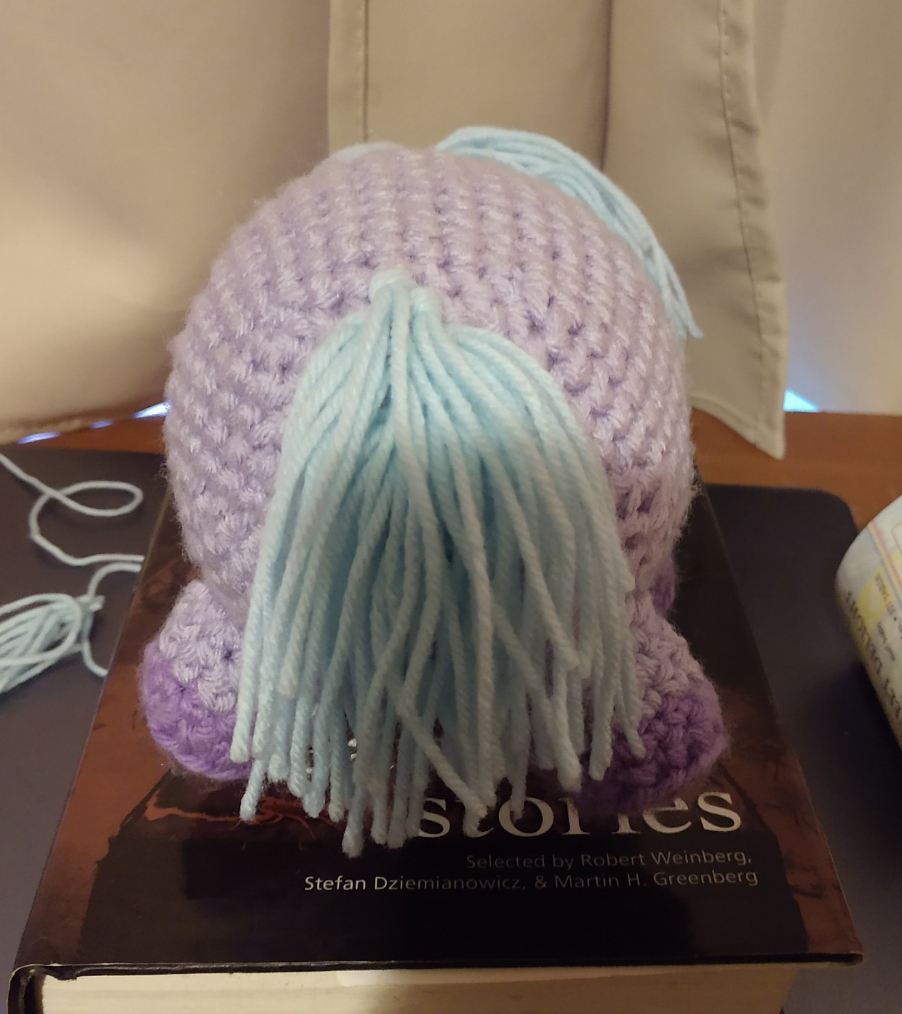
Cut and style to preference.
Congratulations, your amigurumi fluffy is done! Please share any fluffies you may make from this pattern with me, and feel free to ask me any questions you may have at any point!

This pattern is free for the community to use and exploit. You can add to it to make it better, try to make a fluffalo or a seafluffy, whatever your heart desires! Have fun ![]()